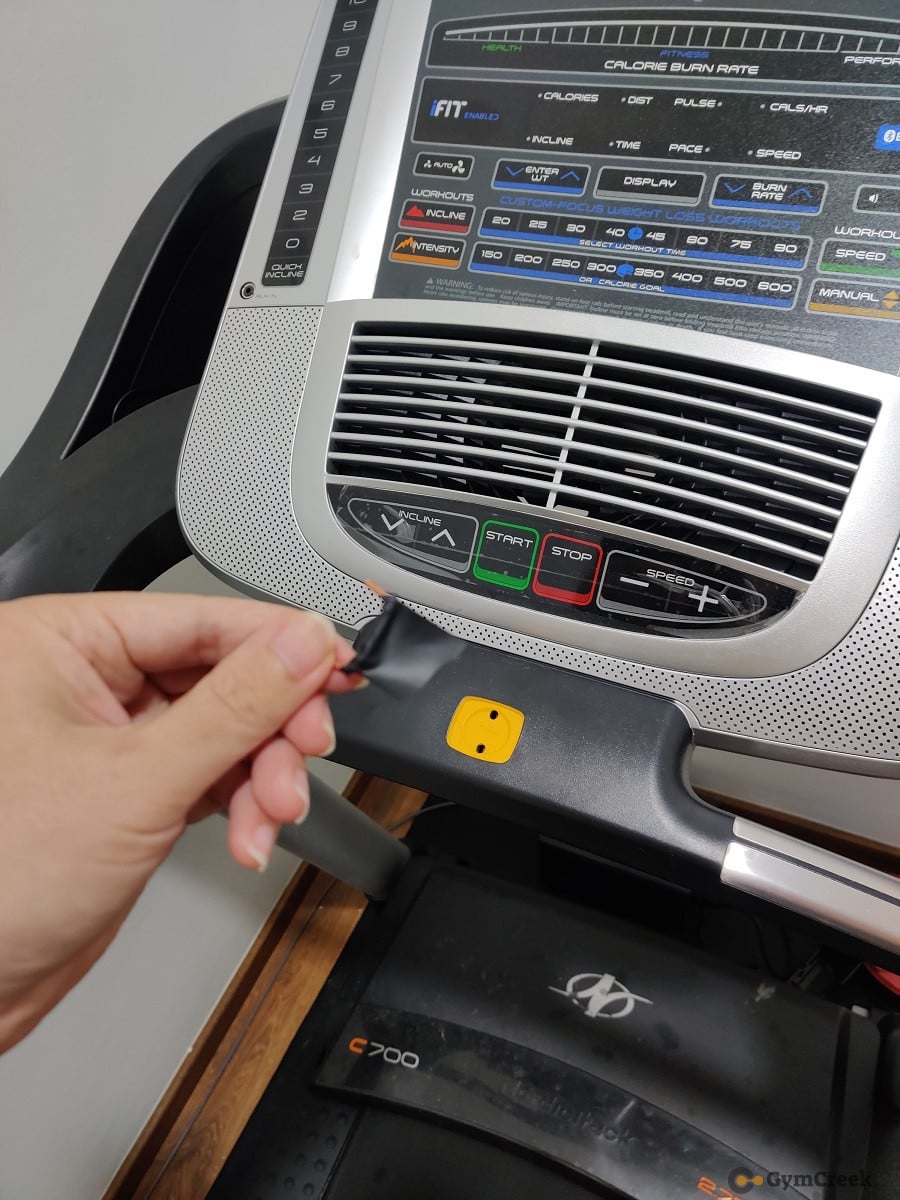
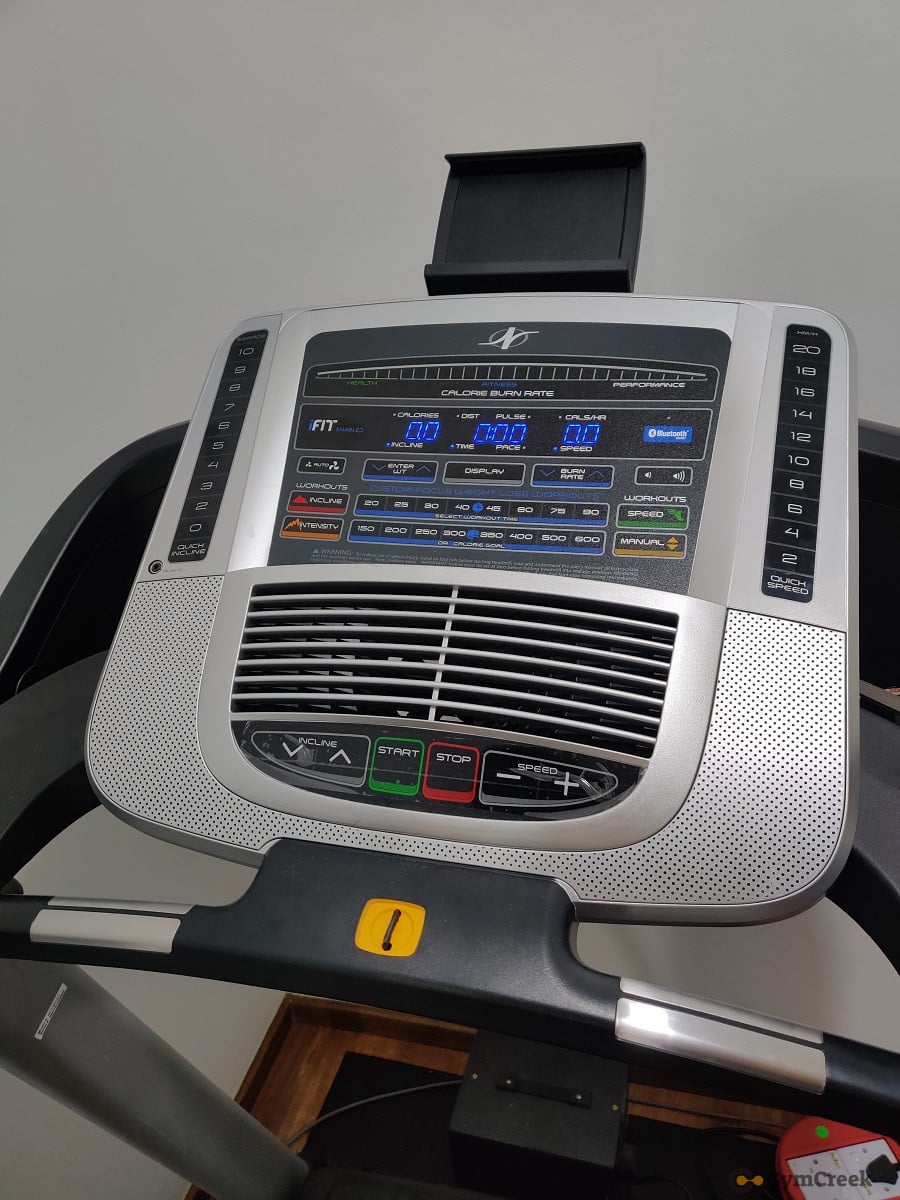
To start my NordicTrack treadmill, the first thing I will do is to turn on the treadmill, and make sure the Safety Key is properly inserted.
Without the safety key, you won’t be able to turn on the treadmill and the console display will not start as well.
If you have the treadmill safety key inserted but it is not working, read this post.
What to do if you lose the treadmill key?
No worries, in this post I will share how to DIY a simple treadmill key to make the treadmill work again.
Warning: Please turn off the power supply of the treadmill if you are inserting the wire into the key holes before the insulation tape is wrapped on it
If you prefer to watch video, here’s how I DIY the treadmill key.
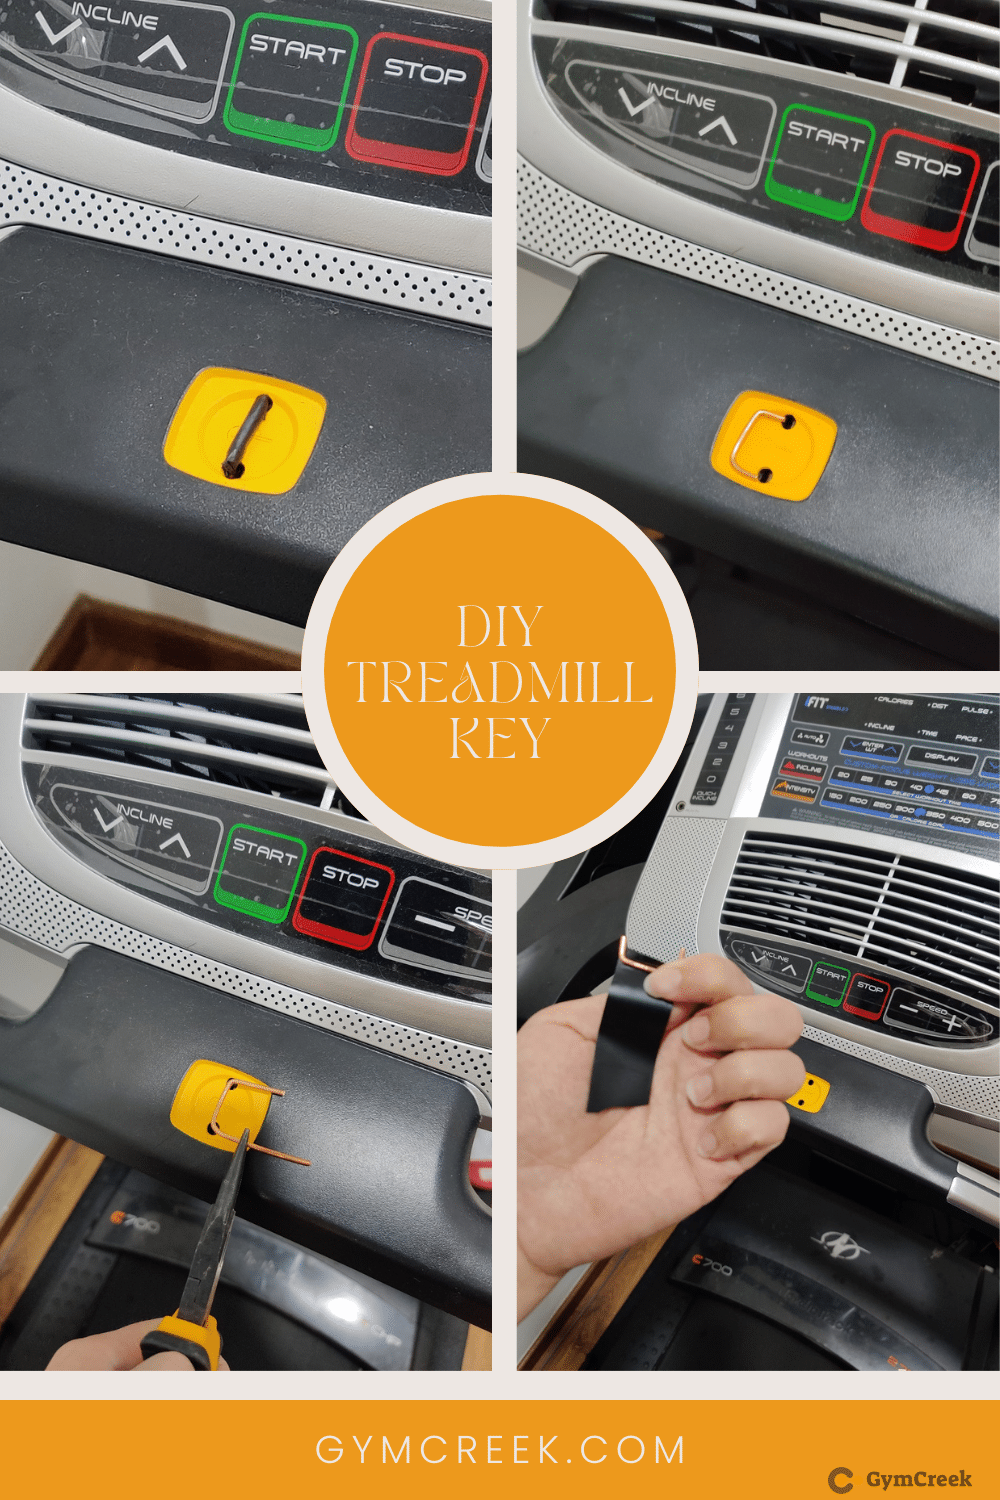
DIY NordicTrack Treadmill Key
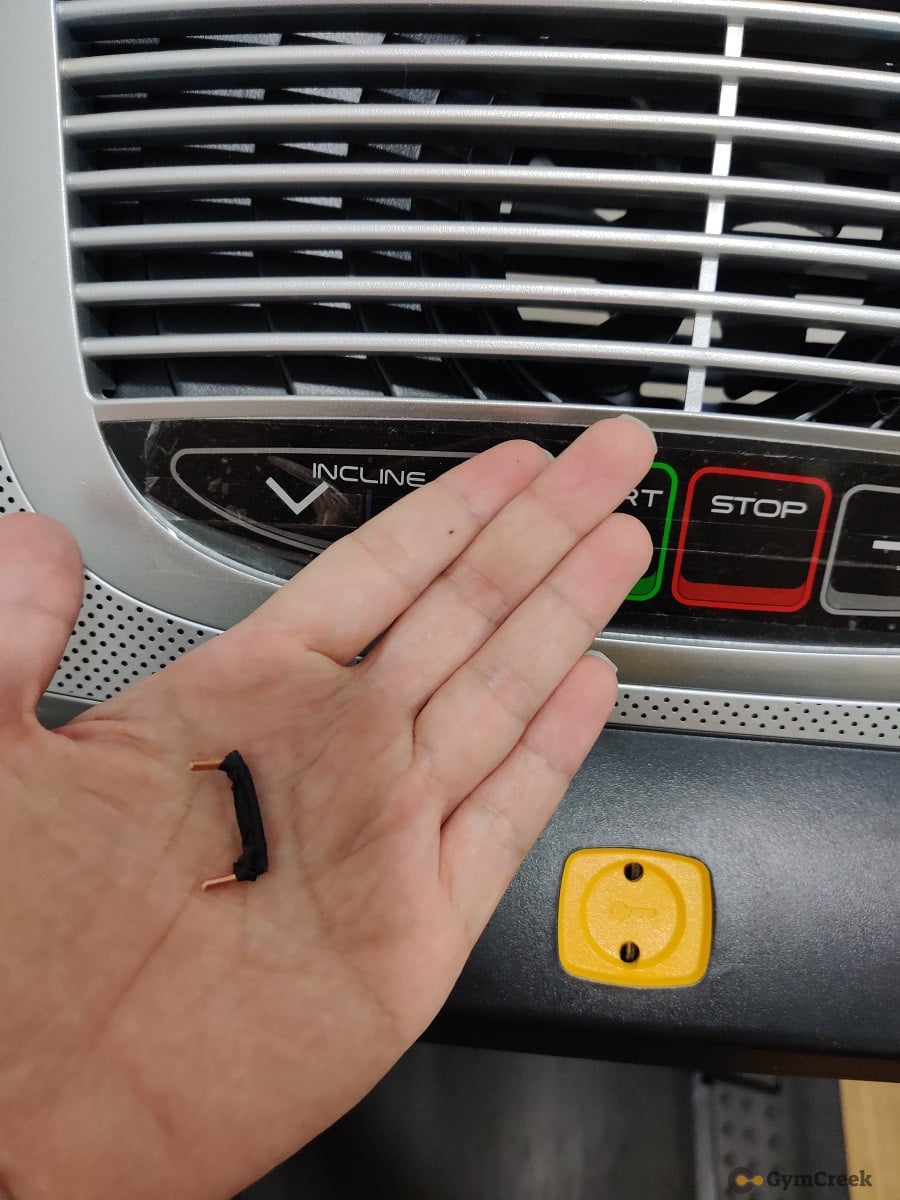
- Find a copper wire that can fit into the key holes of the treadmill
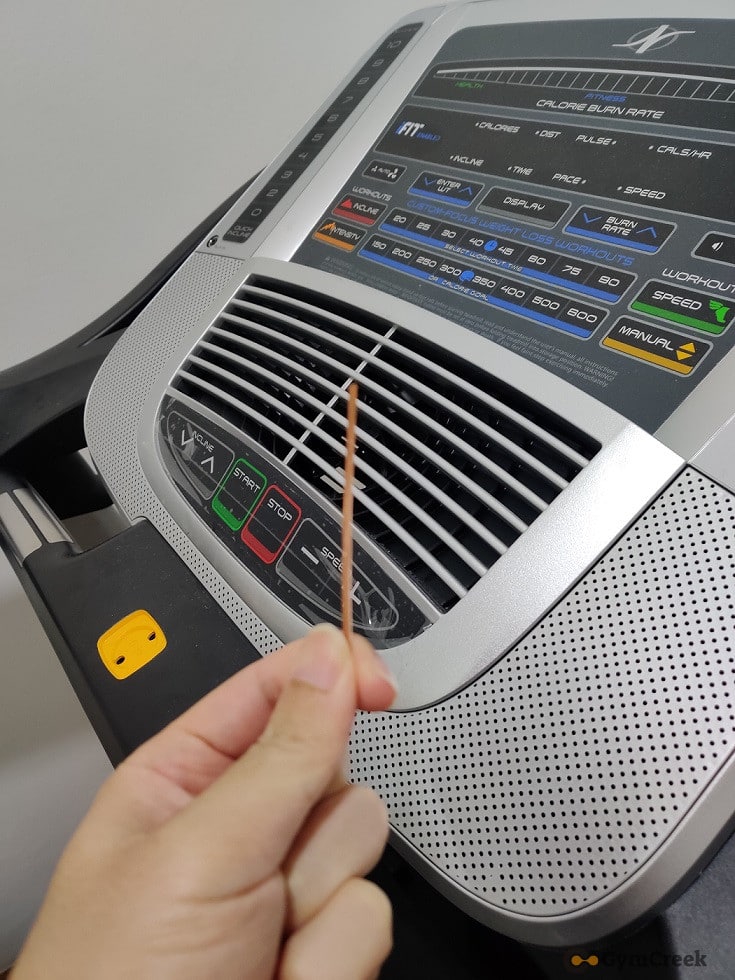
You may get a normal copper wire, or electrical wire that can fit into the key holes of your treadmill as shown in the image above.
Roughly measure and ensure the wire has enough length for this DIY project.
Please try to insert one end of the wire into the hole to make sure it can fit into the hole tightly.
The copper wire I used was a 2mm diameter wire, and it fits well into the key holes.
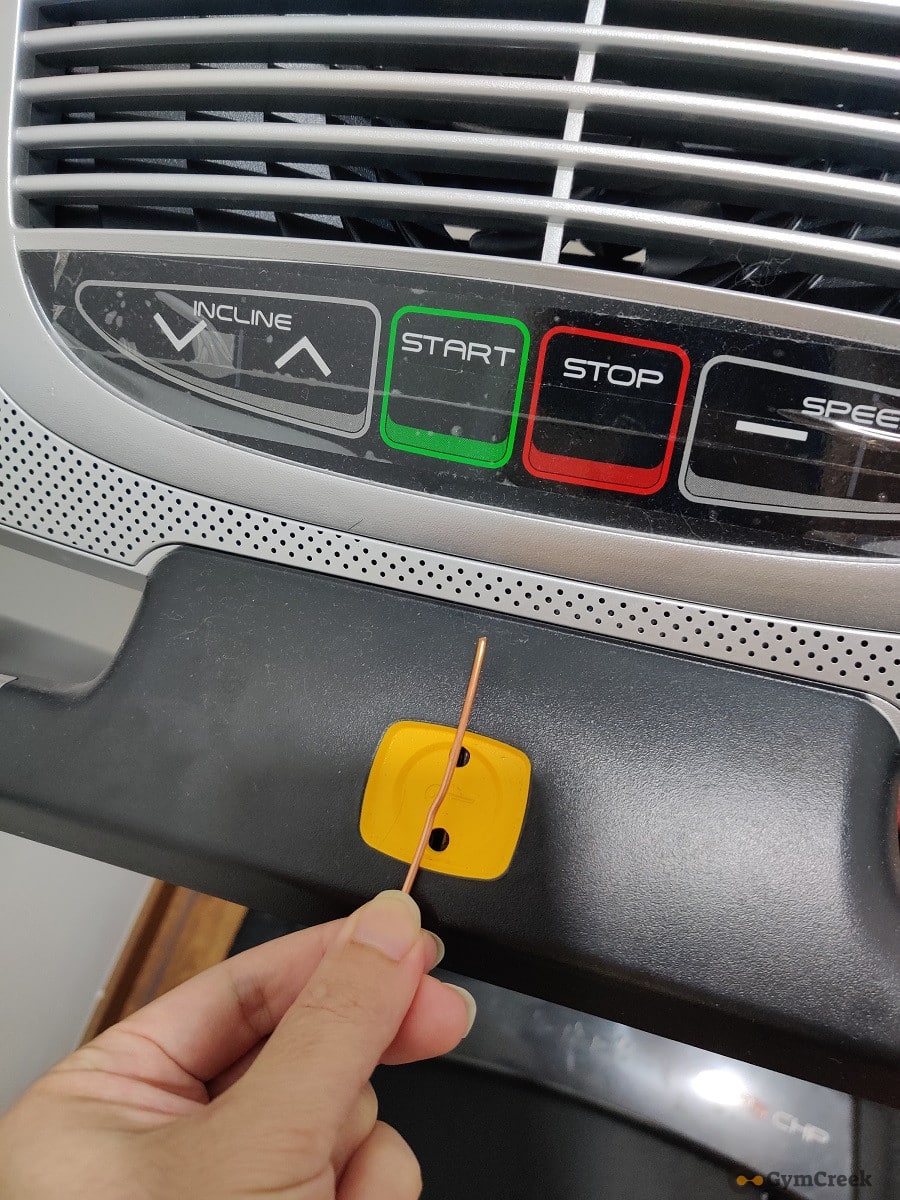
- Bend The Wire
Please use a plier to bend the copper wire into “[” shape as shown in the image below.
If you do not have a plier, you may use your hand to bend it, just it will be more difficult.
Make sure the bent wire has accurate length and dimension to fit into the key holes later.
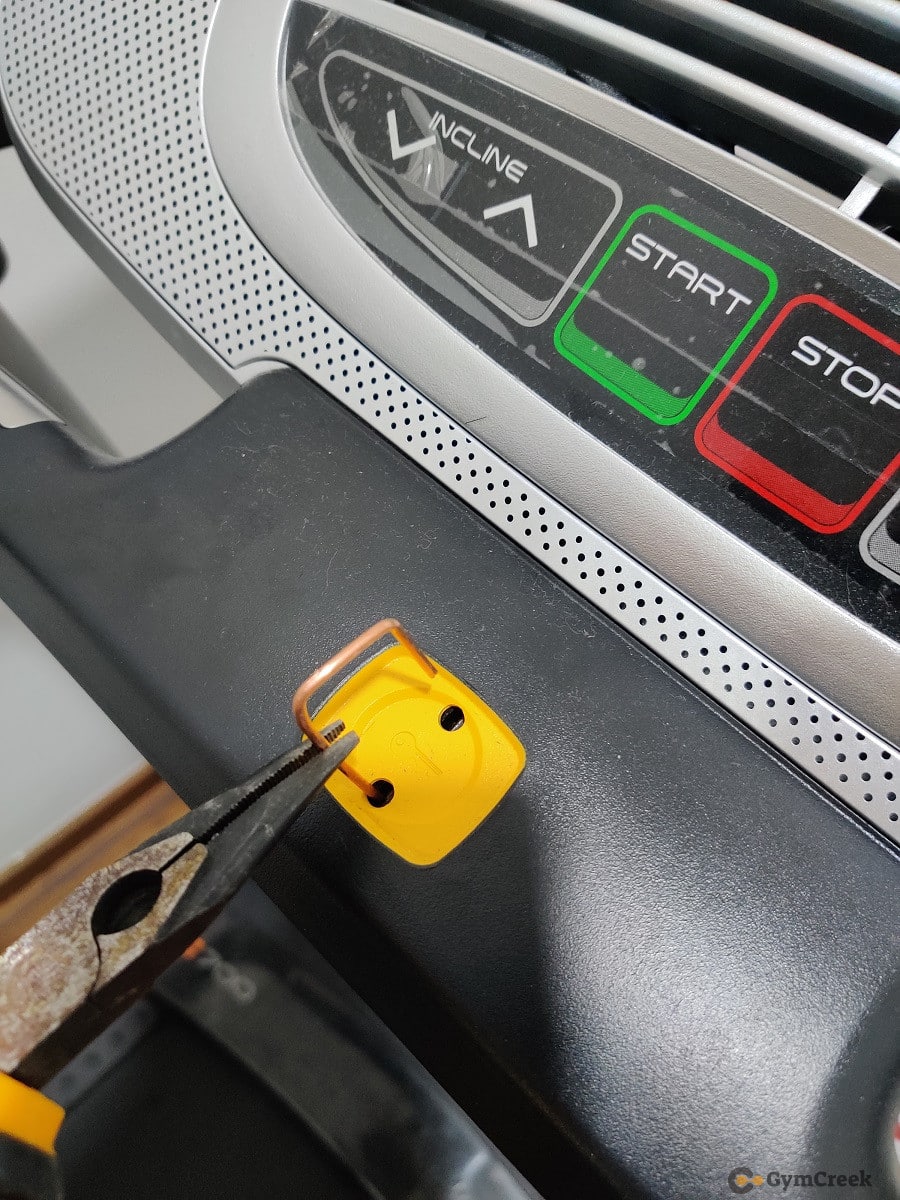
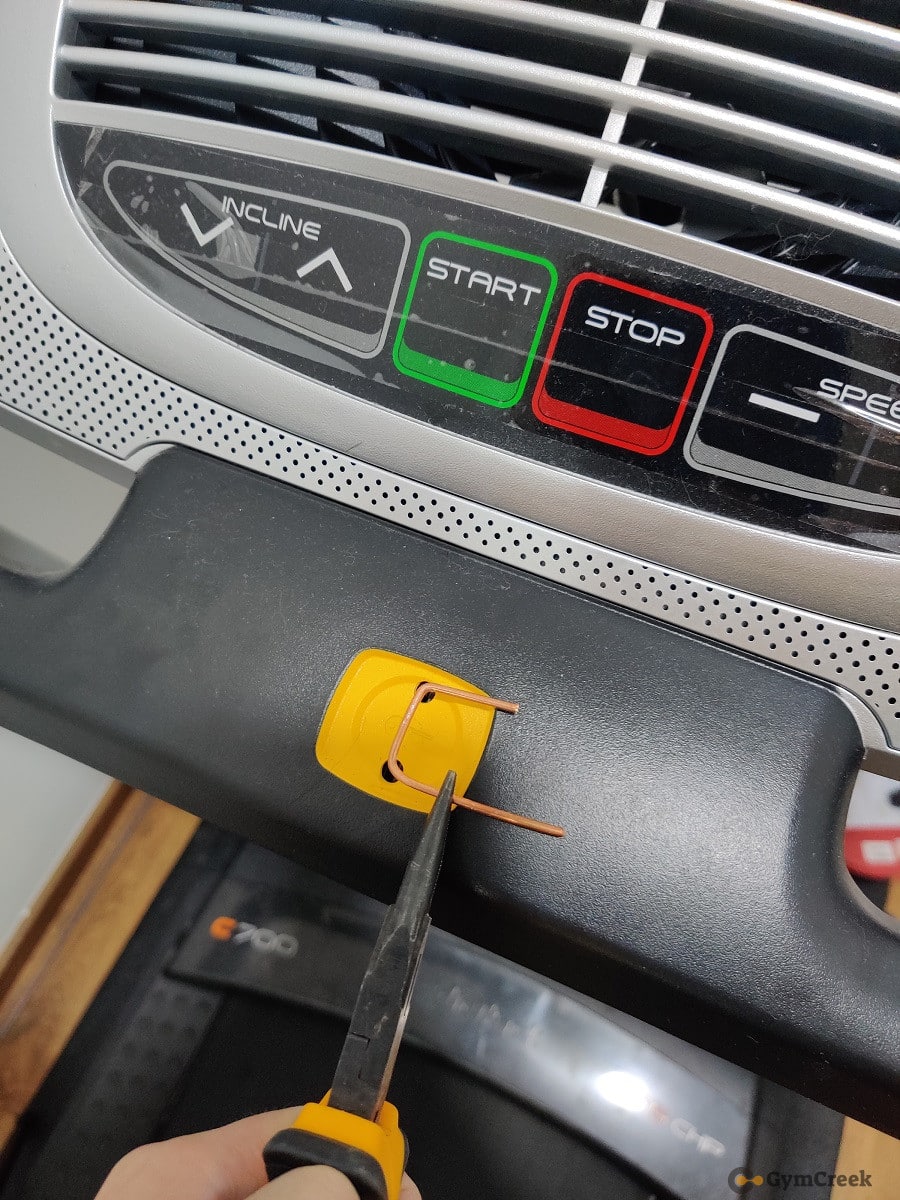
- Cut the extra parts of the copper wire
Next, use a plier to cut down the extra parts of the copper wire.
In my case, it was approximately 1cm long for each side.
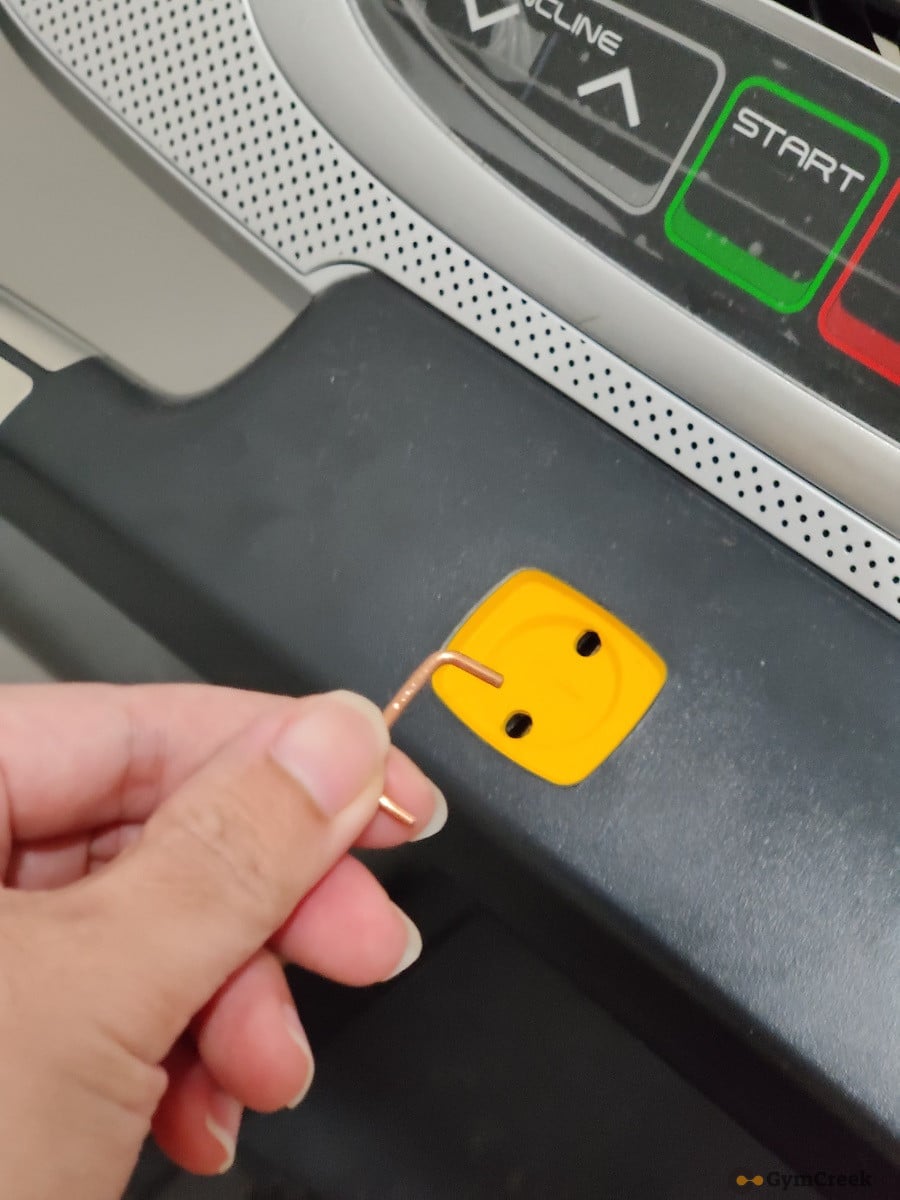
And my image below shows that the copper wire can fit into the key holes easily.
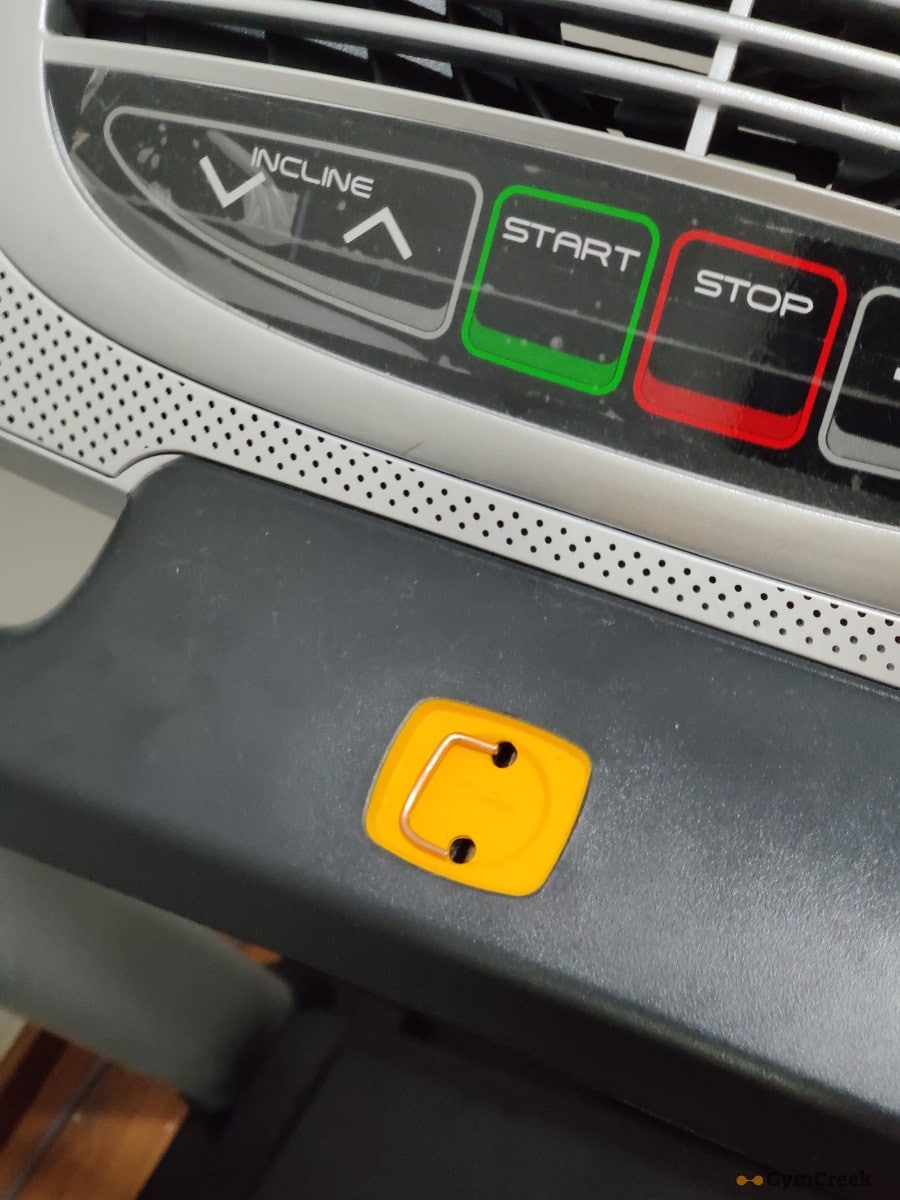
- Wrap the copper wire with insulation tape
Since the copper wire transmits electrical power, it is safer to wrap it with insulation tape as shown in the image below.
I used a common insulation tape which I can find in my local store.

I only wrap the upper part of the copper wire.
There is no need to wrap the two other end sides.
It would be better to wrap it more rounds and make it thicker.
And yes, the DIY treadmill safety key is basically done, but I will do one more step to ensure it won’t hurt anymore.
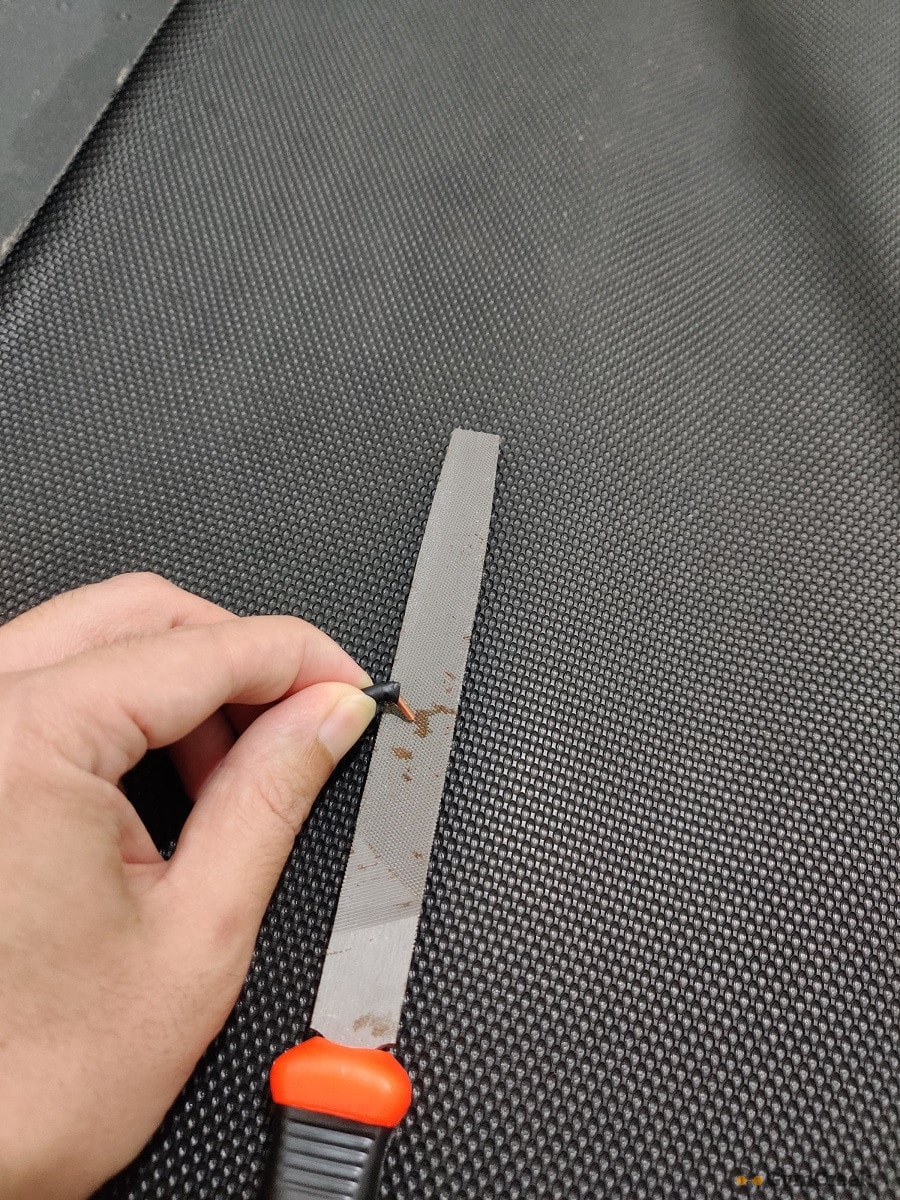
- Use a file to grind the sharp end of the copper wire
Since the two ends of the copper wire are sharp after cutting, it is a good idea to use a file to grind it.
Just like my image below, rub one end of the wire copper on the file and do the same for another end.
Make sure the ends of wire are not sharp anymore and won’t hurt anyone.
- Test if the DIY treadmill key works
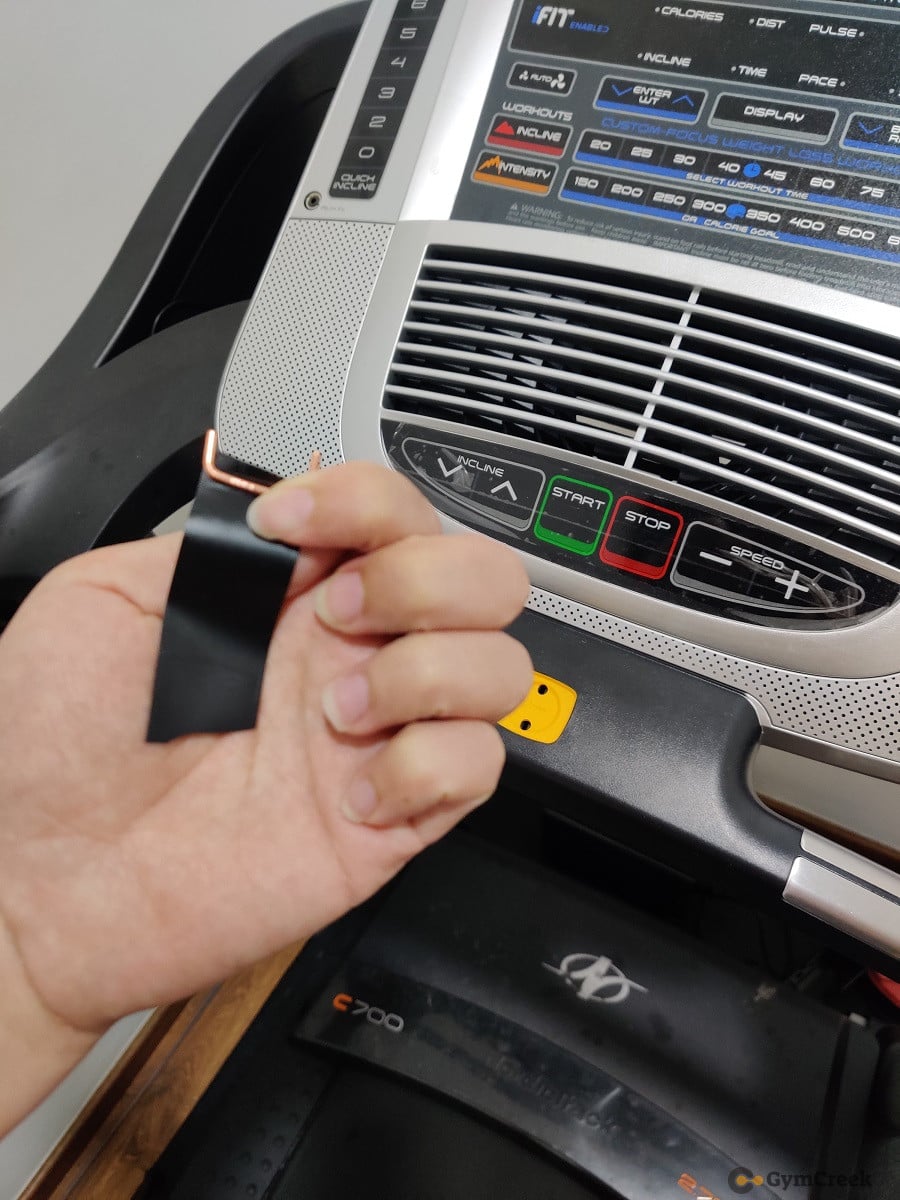
Now, the DIY treadmill key is done, and you would need to test if it works on your treadmill.
Just insert the DIY treadmill key into the holes as shown in the image below.
Make sure it is tight as I believe you do not want the treadmills to stop suddenly during your workout session due to the loosen safety key.
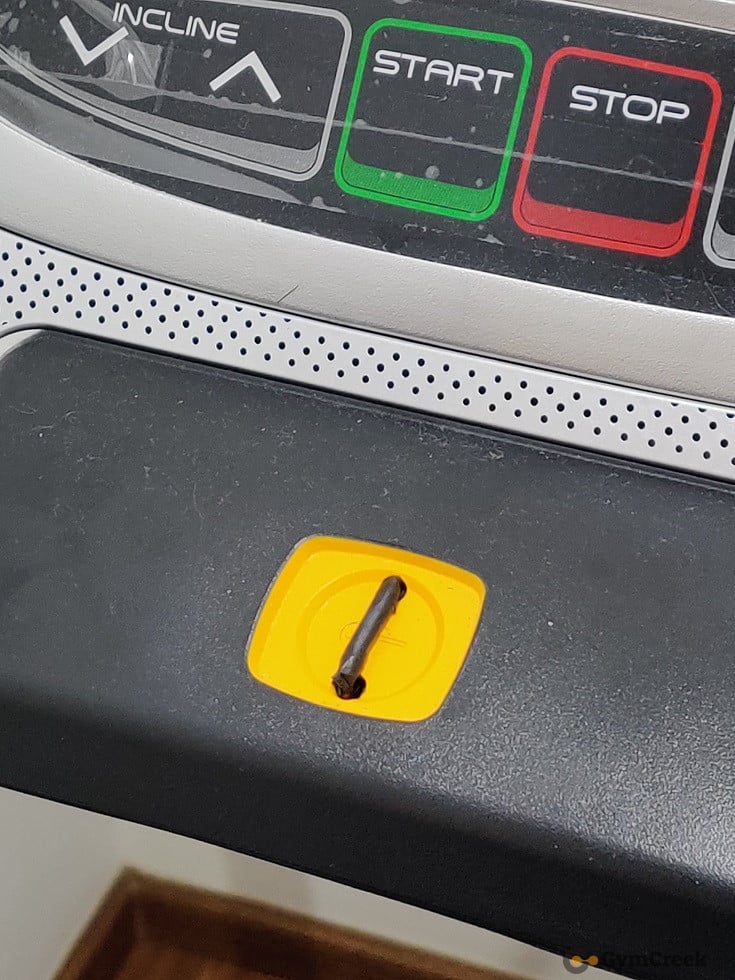
Next, turn on the treadmill and the treadmill console should be starting as well as shown in the image below.
Yes, my own DIY treadmill key works fine on my treadmill.
It could just replace my original treadmill safety key if it is lost.
Try to remove the key and see how the treadmill responds.
In normal case, when the safety key is removed, the console will be shutting down and the treadmill belt will stop moving.
When you reinsert the key back, the treadmill will be ready to start again.
Conclusion
That’s a wrap on how I DIY the treadmill key.
There might be some other workarounds if you lost the treadmill key.
Some models of treadmill might need to use a simple magnet to replace the treadmill.
Or you may consider bypassing the treadmill key by altering the electrical connection at the back.
But this would also remove the safety protection in case any accident happens and you won’t be able to stop the treadmill immediately.
I would prefer to keep the safety feature of my treadmill, and hence DIY a treadmill key is my first choice.
I hope you find this post useful, DIY your own treadmill key and replace the old lost treadmill key.