Wide Grip Bench Calculator
Estimate your bench grip width, grip-to-shoulder ratio, range of motion change, pec stress, and setup score before you move your hands wider.
📌Wide Grip Presets
Presets load practical bench profiles and then calculate immediately so you can compare safe, moderate, and aggressive wide-grip choices.
⚙Calculator
Bench grip snapshot
Enter your grip and body measurements to estimate width, ROM, stress, and setup fit.
📊Metrics Grid
📑Reference Tables
| Grip Ratio | Width Class | Typical Feel | Setup Note |
|---|---|---|---|
| 1.35-1.55x | Close-medium | Longer ROM | More triceps |
| 1.55-1.75x | Moderate | Balanced press | Easy to learn |
| 1.75-1.95x | Wide | More pec demand | Check elbows |
| 1.95x+ | Max-wide | Shortest ROM | Higher caution |
| Grip Change | Estimated ROM Effect | Training Impact | Adjustment |
|---|---|---|---|
| 0-1 in | Minimal | Same pattern | No special ramp |
| 1-3 in | Small drop | Useful test | Add pause work |
| 3-5 in | Clear drop | New groove | Lower load first |
| 5+ in | Large drop | Big stress shift | Use gradual steps |
| Elbow Angle | Pec Bias | Shoulder Demand | Use Case |
|---|---|---|---|
| 40 degrees | Lower | Usually calmer | Shoulder care |
| 55 degrees | Moderate | Balanced | Strength work |
| 70 degrees | High | Higher | Wide bench |
| 80 degrees | Very high | Highest | Advanced only |
| Signal | Low | Moderate | High |
|---|---|---|---|
| Pec stress score | 0-39 | 40-69 | 70-100 |
| ROM reduction | 0-5% | 6-14% | 15%+ |
| Width change | 0-2 cm | 3-8 cm | 9 cm+ |
| Intensity check | 60-75% | 76-88% | 89%+ |
💡Bench Setup Tips
Grip width is treated as a static setting on a dial by most lifters. Pick a spot on the bar that’s comfortable and leave it there until the bitter end.
The thing is, because your shoulders change with fatigue and your pecs adapt to specific angles, a grip that works for one situation might be a disaster for another. What feels good for a fresh one-rep max may be a disaster when you’re doing high-volume work for hypertrophy.
How to Use the Wide Grip Bench Calculator
Use the wide grip bench calculator to see these tradeoffs ahead of time. This lets you measure them in terms of risk and reward, rather than guesswork.
Your shoulder width are the key input. It is not about vanity. But it’s the geometric starting point for all else. From there, the tool will compare your desired grip with your shoulder width and produce a ratio.
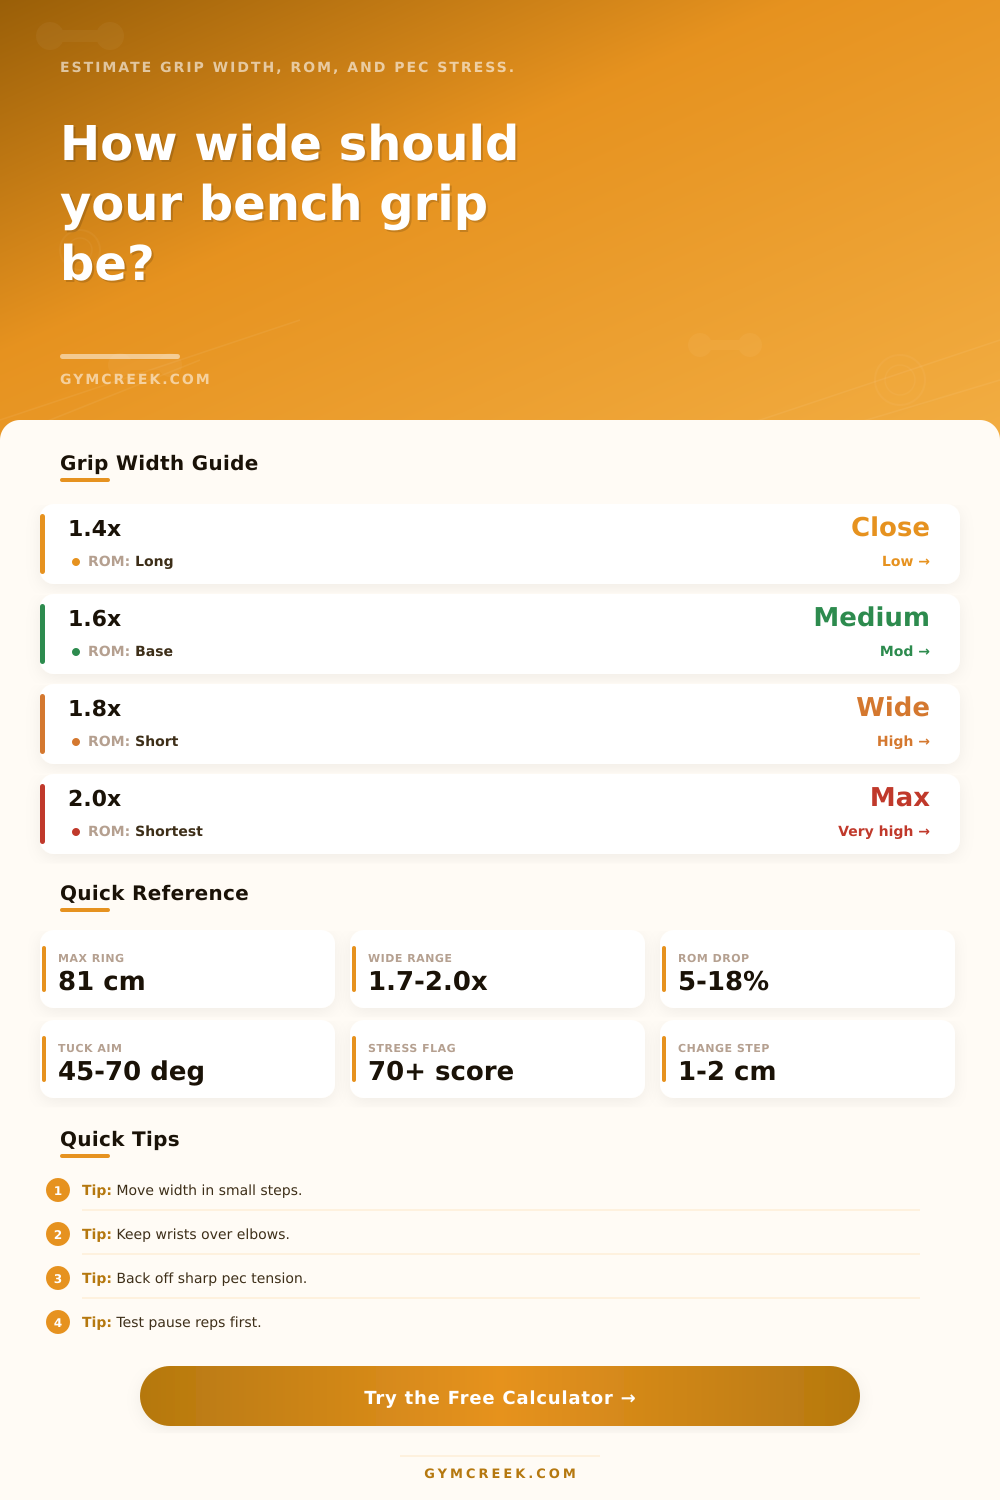
Most athletes is within that sweet spot of about 1.6 times their shoulder width. It provides a balanced lever arm without crushing front delts.
Now when you start pushing north of 1.8 times your shoulder width, you’re in a range where the amount of space the bar can travel decreases dramatically. The bar move shorter distances, which might seem like an efficiency win (less energy required by the pecs since they’re forcing the bar at a steeper angle), but that’s when you’ll start seeing issues with shoulder health.
You should also factor in elbow flare. This alters stress distribution completely, which is why the calculator includes a request for this variable. Forty-degree tuck at the elbow protects the shoulder joint, but transfers more load to the triceps. Eighty-degrees of flaring maximizes recruitment by the pecs.
The penalty? Increased shear force on the rotator cuff. This increases sheer force on the rotator cuff. Most folks flare the elbows because they believe it appears more aggressive. Usually, it just feels weaker and hurts more later.
The tool flags this too, adjusting the pec stress score. When that number exceeds seventy, you’re playing with fire.
The page contains reference tables showing how various elbow angles correspond to relative tissue demand. It’s a good way to double-check before attempting a heavy set.
The other factor that is easily overlooked is range of motion. When you have a wide grip, there’s less distance for the bar to travel. That makes it feel like weight isn’t as heavy.
The downside is severe. You aren’t getting that full tricep contraction at the lockout position. Instead, it’s more of a chest squeezing action. For raw strength transfer, you may not be willing to give up that lockout stability.
The calculator will tell you how much your range of motion decreases. A five-percent decrease is usually fine. It’s generally small. More than fifteen percent? You’re realy altering the exercise. You’re not benching anymore; now you’re performing a close variant chest press with added steps.
Hand placement, arch, and wrist positions all impact the setup score. These adjustments change the input factors. For example, a high arch shortens the distance the bar needs to move, masking a weaker grip width. You’re building a house on shaky ground if you have to arc up significantly to make up for a too-widely spaced grip. And the tool penalizes that by reducing the setup score.
It makes you wonder if you really have any strength at all or simply a strong structure.
Wrist position is crucial, specifically a stacked position. Any bending backwards under load means there’s no way anything about your grip is going to help protect those joints. Make ’em vertical. Assuming correct form, the calculator does so. Your real-world situation being different will result in overly optimistic numbers.
Transitioning to this grip should be gradual. Don’t jump four inches wider overnight. You need time for your connective tissue to adjust to new angles. That’s why the tool is filled with advice of going one-to-two centimeters at a time.
Before you increase the width, test it out with some pause reps. A pause removes momentum; it exposes instability. If you can handle weight in a paused rep at the bottom, then you’re good to go heavier. If your chest is pinning or your elbows are flaring uncontrollably, back off now.
Pain shows up late. An early warning sign is tightness in the front delts or pecs post-session. Listen to it.
For example, the calculator’s presets help with comparison. Load up a powerlifting profile and let it spit out the math. Then, swap over to a shoulder-care profile and look at those different stress scores. The wide-grip presets show off just how far outside of typical training routines they are.
This isn’t about finding the widest grip you can. It’s about finding the most effective grip for your existing set of goals and anatomy.
Grip width is a tool, not a trophy. Apply it to a specific problem, such as underdeveloped chest fibers. Apply it to a specific problem, like overcoming a strength plateau, and use it until the effect ceases to be new. When it stops working, move on.
The numbers’ll tell you what to do, but your body will confirm. Listen to the feedback loop. Start small, expand slowly, and stay within your stress limits. You, and your shoulders, will thank you when your training remains heavy and your body feels good.