Safety Bar Squat Conversion Calculator
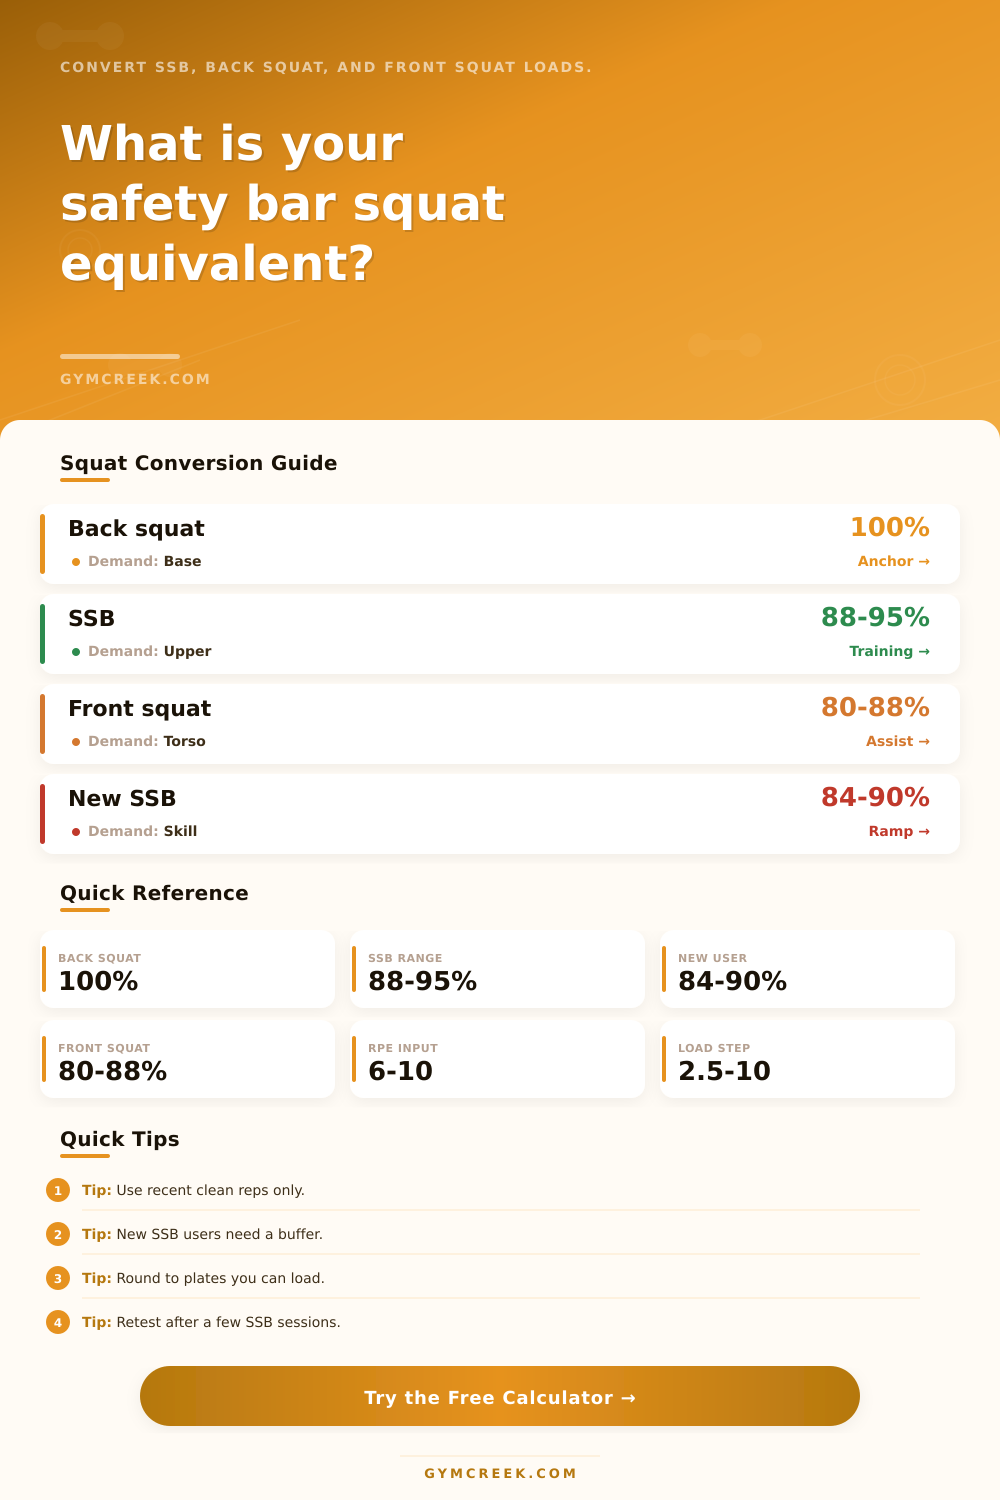
Convert a back squat, safety bar squat, or front squat set into practical SSB estimates, equivalent maxes, and rounded training loads.
📌Presets
Each preset loads a real squat profile and recalculates the conversion using the current unit labels, bar setup, and target loading plan.
⚙Calculator
SSB conversion snapshot
Enter a known squat set to estimate SSB and back squat equivalents.
📊Fitness Metrics Comparison
📑Reference Tables
| Known Lift | Back Squat Basis | Typical SSB | Notes |
|---|---|---|---|
| Low bar back squat | 100% | 86-93% | Largest drop for many powerlifters |
| High bar back squat | 96-100% | 90-96% | Closer torso angle to SSB |
| Safety bar squat | 105-116% | 100% | Best direct anchor |
| Front squat | 112-125% | 103-112% | Depends on front rack skill |
| SSB Setup | Ratio Effect | Training Feel | Best Use |
|---|---|---|---|
| High handles | +1 to +3% | More assistance | Overload or rehab blocks |
| Neutral handles | Baseline | Balanced bracing | Main SSB programming |
| Low handles | -1 to -3% | More upper back | Strength carryover |
| Hands-free | -3 to -6% | Strict torso demand | Technique and control |
| Experience | Ratio Adjustment | What It Means | Loading Choice |
|---|---|---|---|
| New to SSB | -4% | Bar path still unfamiliar | Start conservative |
| 2 to 6 sessions | -2% | Groove is improving | Small weekly jumps |
| Regular SSB | 0% | Use normal conversion | Program directly |
| Specialist | +2% | Skill lifts the ratio | Retest often |
| Formula | Variables | Used For | Limit |
|---|---|---|---|
| Epley adjusted | Weight, reps, RPE | Set to 1RM | Best under 10 reps |
| Back equivalent | Source factor | Common baseline | Technique dependent |
| SSB ratio | Handle and skill | SSB max estimate | Bar designs vary |
| Rep load | 1RM and reps | Work set estimate | Needs rounding |
💡Tips
Your back squat numbers don’t translate. You stand underneath the safety squat bar and your center of mass shift forward, putting more strain on your upper back than your quads. That three hundred pound low bar number feel like a mountain. Lifter frustration follows because they wishes their strength could just carry over without guessing. Plug in your most recent sets into this calculator and let it do the math for you. Save time without all that outdated forum advice or vague percentages.
So what’s going on? The answer is simple; the lever arms are completly altered by the safety squat bar. You don’t just have to move weight. You also has to control the torque created by the handle position, which requires an upright torso. This require extreme core bracing and upper back endurance, something many traditional barbell squats fails to account for.
How to Convert Your Squat Numbers
Check out the reference table and notice how all of the conversion ratios is within the range of eighty-eight to ninety-five percent of your low bar squat. That’s a significant difference and it’s because of the design of the bar itself. Your legs cannot generate enough force to get the weight off the floor before your structure give out. That’s a structural ceiling, not a lack of effort.
To get into the system, you’ll have to be honest with yourself regarding your capabilities. Your one rep max is calculated using a specific rep count, weight, and RPE score that you know you can achieve. Why? Because grinding out three reps at full capacity produces a very different projected one rep max then does squatting five reps with 90% of your strength. You should of some solid reps under your belt here; no hacking up the final rep to eke it out. Maintain consistency in terms of your depth and don’t let your speed drop. Inflate your RPE input if you had to hack up the final rep. This will scale the estimated max back down a bit, that gives you a more conservative number to start your safety squat bar session.
The variable they don’t talk about nearly enough when making those equations is experience. Someone who’s been at this for weeks or even just days are going to achieve different percentages than a brand-new person. That new person hasn’t mastered their brace point on the handles yet or the best line down the bar path. This factor is built into the equation: there’s a buffer for the beginner which shows that here, skill acts as a limiting factor on strength. You’re driving with your heels but also learning how to hold a strange object steady. It should feel clunky; it’s supposed to be. With each session, that buffer decreases and you can load up nearer to your highest possible number.
The success of this lift has far more to do with the handle height than most lifter are willing to admit. When you use a high handle (closer to what people think of as a traditional squat), it’s easier to build volume or rehab from an injury. The handles helps support your weight. Using low handles or the hands-free version strips away that support and makes your upper back carry all of the load. That change drastically reduces the amount of weight you can expect to lift as the upper body will be the limiting factor well before the legs give out. So plan appropriately. If you’re using low handles but loading up like a high handle would allow, you’ll either end up injured or with poor form.
It’s going to spit out some target loads for your working sets, an estimated one rep max on the safety squat bar, and a back squat that will keep things in perspective. This isn’t gospel, these are guides. On day one use rounded weight as a starting point. Add small increments next week if the depth comes easily and the speed looks good. Drop back down if the bar stalls or your lower back rounds. It’s about progressive overload with integrity.
The safety bar isn’t about ego lifting; it’s about developing strong, resilient muscle. It highlights any weakness in your core and back muscles that’s obscured when lifting heavy off of low bar. Smart number conversions will transform your exposure from an exercise frustration into a training asset. Confidence comes not through mimicking previous results, but through honoring the new mechanics. Patience and exacting effort are rewarded with strength that carries over naturaly to all other squats you’ll lift.