Ruck Weight Percentage Calculator
Compare pack weight to bodyweight, choose the right ruck load zone, and check how terrain, pace, duration, and experience change the safety cap.
📌Presets
Each preset loads a real ruck scenario and calculates the load as a bodyweight percentage.
⚙Calculator
Ruck load snapshot
Enter bodyweight, ruck weight, and route details to check your training zone.
📊Ruck Benchmarks
📑Reference Tables
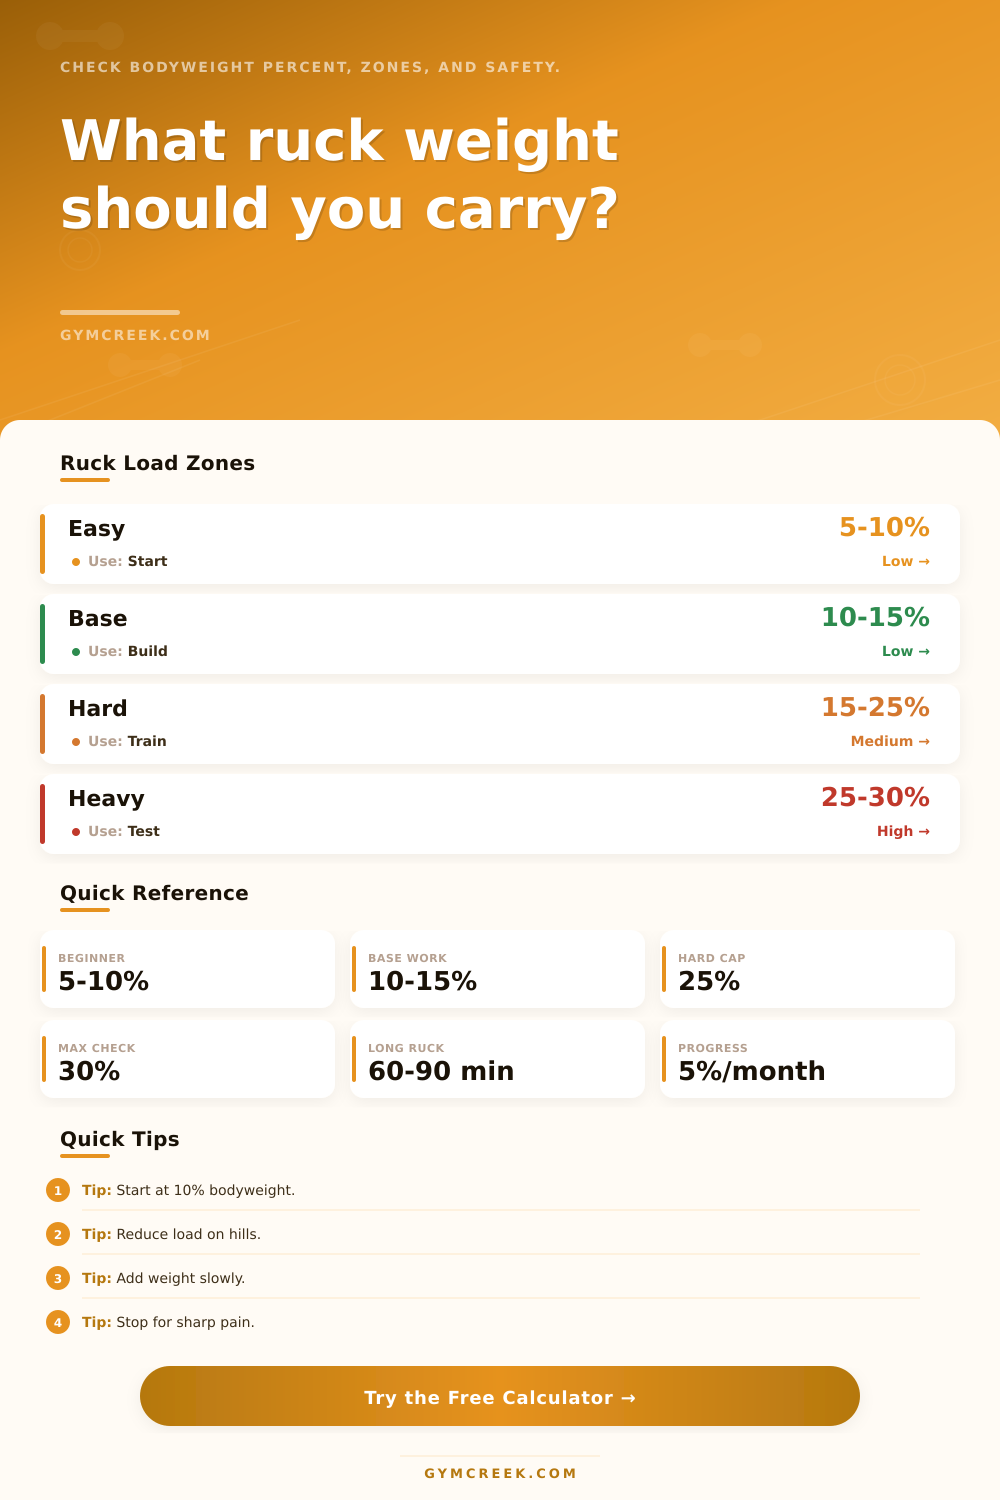
| Zone | Load % BW | Best Use | Watch For |
|---|---|---|---|
| Easy recovery | 5-10% | Technique, walking base, low fatigue days | Keep pace conversational |
| Aerobic base | 10-15% | Most weekly ruck sessions | Feet, shoulders, hot spots |
| Conditioning | 15-20% | Harder route or faster pace | Stride change and posture loss |
| Heavy strength | 20-25% | Shorter loaded strength sessions | Limit duration and downhill pounding |
| Selection practice | 25-30% | Specific preparation blocks only | Requires experience and recovery |
| Terrain | Stress Factor | Load Adjustment | Use Note |
|---|---|---|---|
| Flat pavement | 1.00 | No reduction | Best for testing pace |
| Rolling road | 1.08 | Lower cap by 1% | Good everyday variety |
| Uneven trail | 1.18 | Lower cap by 2% | Stability demand rises |
| Steep hills | 1.34 | Lower cap by 4% | Shorten the session first |
| Sand or soft ground | 1.45 | Lower cap by 5% | Very high foot and calf stress |
| Scenario | Typical Load | Duration | Goal |
|---|---|---|---|
| New walker | 5-10% | 30-45 min | Learn pack fit |
| Base builder | 10-15% | 45-75 min | Repeat weekly |
| Trail ruck | 10-18% | 60-120 min | Route skill |
| Fire prep | 15-25% | 30-75 min | Work capacity |
| Selection prep | 20-30% | 45-120 min | Specific demand |
| Progression | When Ready | Change | Reason |
|---|---|---|---|
| Load first | Easy pace, no pain | Add 2-5% | Small tissue dose |
| Time first | New to rucking | Add 5-10 min | Build foot tolerance |
| Pace first | Stable base load | Drop 15-30 sec | Conditioning focus |
| Terrain first | Road feels easy | Add mild hills | Specific strength |
| Deload | Hot spots or aches | Cut load 20% | Keep the habit |
💡Tips
Everyone has their own starting point, so insted of looking at pounds as an absolute number, we want to think about them in terms of percentages. Twenty pounds is very different for someone who weigh one-hundred-and-fifty-pounds compared to someone weighing two-hundred-pounds. The percentage will level the playing field by giving you a metric that scales with your physiology. This allows the calculator up top to tell you whether the load you’re carrying provide a good training stimulus or is merely useless stress on your body.
Plug in your numbers and stop guessing whether it’s worth carrying weight. Check the percentage output. Are you doing the right volume for your level of effort? Ten-15 percent of your bodyweight is considered aerobic base zone; it’s something you can do repeatedly (daily or weekly, depending on your recovery) and not break yourself down, but still improve your endurance.
How to Ruck Safely
The stress load isn’t too high and your tendons thickens up while your shoulders get stronger and learn how to handle weight. It’s foundational work, preparing you for higher loads. When you get up into that fifteen to twenty-five percent range though, things becomes about strength instead of endurance. Your muscles are being asked to lift more weight for longer distances. This alters not only your movement but also your later soreness.
Because the demand on your muscle fibers is greater, you need to be more mindful of your body in this zone so you can build strength without damaging yourself. Safety training also has to do with terrain. It matters when you’re hiking over rough surfaces, such as steep trails or soft sand. Because uneven terrain increase knee-ankle stress, the tool takes into account surface type.
When you hike a flat roadway, for example, you can concentrate on breathing and pack fit; it’s relatively easy to predict what happens next. But once you hit a steep trail or soft sand, variables increase. Your heart will race and your stabilizer muscles is asked to work harder. This is why the reference table advises lowering your load cap on rough terrain.
The harder part isn’t carrying extra weight. The harder part is bad footing. Carrying heavy weights over uneven surfaces will wreck your weeks of training in one second with a twisted ankle. No matter how strong you are, bad footing only makes it easier to get hurt. Don’t assume your pack isn’t hurting your joints; watch where you step, too.
So bottom line: When walking across a hard surface, adjust according to conditions. This will better protect your joints different than carrying added weight. And it does this in some interesting ways that might not be obvious. For instance, a 30 minute ruck with a big pack is strength workout. A two-hour ruck with the same pack is an invitation to injury.
Why? Because fatigue compromises your form. Compromised form results in sharp pains that sideline you for months. The calculator takes into account how long you’ll be moving and reduces the safety ceiling to match to ensure the load stays safe over time. When your goal is long duration, it’ll push you to a lighter percent.
That’s pacing more than quitting, but it protects your joints by maintaining reasonable directions of force. Showing up twice a week at a moderate load will do more then showing up once a month with a hero effort. Smart ruckers know this. Moderate frequency avoids injury and burnout from sporadic, extreme efforts.
Add weight incrementally. As soon as it becomes trivial, add another plate. When you’re able to complete a workout without feeling sore, then and only then should of you add another plate. You’ll know when you’ve added too much weight if your body shows any sign of discomfort. If there’s stiffness in your lower back or your feet start to hurt, listen to what they have to say and either give yourself a rest day or cut back on the weight.
The point is to let your body recover, it’s a key part of the training process, not an interruption. This all ties into my point about viewing the ruck as a long term project. You don’t want to fall into the hole of injuring yourself in the first few miles and giving up completely. Respect the terrain, stick to the percentages, and let your body adjust on its own time. There’s no reason to rush the process; they’ll still be plates waiting for you once your body is adjusted. It also allows you to create a sustainable habit instead of a short term challenge.