Pin Press Load Calculator
Estimate a rack-start pin press load from your full-range strength, pin height, target reps, RPE, and safety buffer.
📌Presets
Each preset uses a real rack-start scenario with its own range of motion, target reps, and safety margin.
⚙Calculator
Pin press loading snapshot
Enter your full-ROM reference and pin setting to estimate a rack-start load.
📊Fitness Metrics Comparison
📑Reference Tables
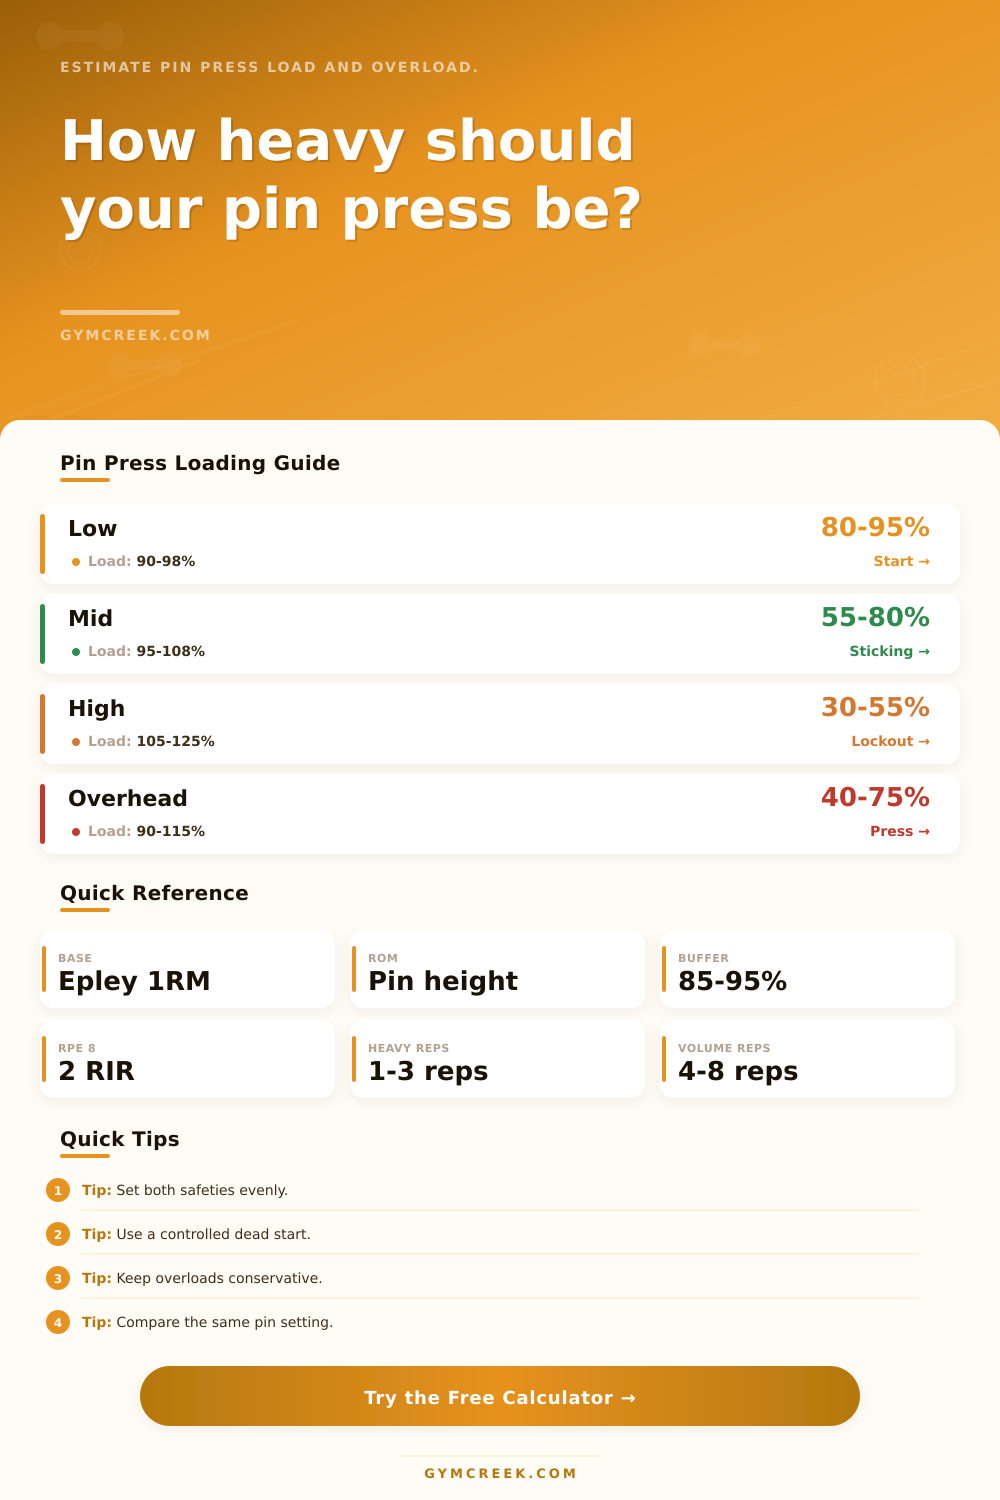
| Pin Height | Active ROM | Typical Load | Best Use |
|---|---|---|---|
| Chest to low pins | 80-95% | 90-100% 1RM | Start strength |
| Midrange pins | 55-80% | 95-110% 1RM | Sticking point |
| High lockout pins | 30-55% | 105-125% 1RM | Lockout overload |
| Very short lockout | Under 30% | Use caution | Specific exposure |
| Target | Reps | RPE | Loading Note |
|---|---|---|---|
| Heavy single | 1 | 7-9 | Practice setup |
| Strength triples | 2-3 | 7-8.5 | Repeatable work |
| Volume work | 4-6 | 6.5-8 | More control |
| Speed pins | 2-5 | 6-7 | Fast starts |
| Variation | Carryover | Overload Bias | Compare Against |
|---|---|---|---|
| Flat bench pins | Bench lockout | Moderate | Bench press |
| Close-grip pins | Triceps drive | Lower | Close-grip bench |
| Incline pins | Upper chest | Lower | Incline press |
| Overhead pins | Press lockout | Moderate | Strict press |
| Formula | Variables | Output | Use |
|---|---|---|---|
| Epley e1RM | Load, reps, RIR | Full 1RM | Base strength |
| ROM percent | ROM, pin height | Active range | Pin setting |
| Overload ratio | ROM and intent | Pin 1RM factor | Partial load |
| Working load | Pin TM, reps, RIR | Set weight | Today load |
💡Tips
Bench Press, With this lift, we’re isolating where the sticking point is for the bench press. Now you can overload just that area. You can overload that area without being limited by your weakest link at the bottom or top. The trick is knowing when to go heavy. How much do I overload? You don’t want to hurt yourself, you want to get stronger.
From there, you input your pin setting and full-range reference, and let the calculator do the rest. No more conversions or coefficients to get wrong. First, you input a known load, like a recent work set of three reps at an RPE of 9. From this, it calculate your true one-rep max using standard equations. Why does this matter? All pin press loads are relative to your full-range strength. Every number that follows rely on the baseline you provide. Use an inflated gym max from a bad day and everything else is going to be off.
How to Use Pin Press Calculators
Next up, the tool accounts for the reduced range of motion. In theory, less distance means more weight should of be possible. But it’s not a linear increase. Just because you’re moving the bar six inches versus eighteen doesn’t mean you can add twenty-five percent. Here’s where a lot of lifter mess up. They assume they can use heavy weight because of shorter range of motion. However, they forget that stretch reflex doesn’t come into play with a dead stop. You’re starting at zero velocity and have to produce all your force from there. Your muscles don’t have any elastic energy to assist you in launching the bar. It completely alters the feel of lift. That’s why the exercise works, but only when respected for what it is.
To account for this, the calculator includes overload ratio depending on both training intent and the variation. With lockout work, leverage favors us so we can use heavier percentages of our estimated pin max. For low-pin starts, we need to be more conservative with our loading to ensure the joints are protected throughout the first phase of acceleration. Speaking of percentages, you’ll have to enter in your desired safety buffer as well. Here’s where being practical beats being exact. Using a training max of ninety percent of your estimated pin one-rep max gives you room to breathe, particularly when you’re fatigued (you know who you are) or rack feels unstable. Stability is strength, which is why the suggested weight is a bit lower on an uncertain setup. The bar might bounce and while that can feel like extra help, it usually leads to broken momentum or pinched shoulders. It usually means pinched shoulders or a broken rhythm. To ensure long-term joint health, keeping things quiet and controlled at the start are a must.
On this page, the reference tables break out the pins into overhead, high, mid, and low position. There’s a different physical demand in each zone. Low pins is akin to starting a deadlift, explosive chest and hip drive is required. Mid-pins hit that pesky sticking point when most plates is left behind. High pins isolate the lockout mechanics and triceps while providing a way to use heavier then normal loads that would be dangerous with full reps.
To determine if you should stay conservative or load up, you have to know what zone you’re working in. You’re not trying to lift as much weight as possible. You’re trying to apply just enough stress to force an adaptation without breaking down. Pin presses should of be thought of more like targeted supplementary exercises for your primary lifts. For example if you’re weak off the chest, work some low pins. Stuck in the middle? Then concentrate on mid-range pins. Change your emphasis every couple of weeks so you develops equally across all ranges. You don’t want to build up a new “specialty” that’s only good in the rack; you want to eliminate weaknesses in the entire lift.
Try to think about it like this: the estimates are just starting points; tweak to match based off the sensation of the bar. Sometimes dead stop will feel harder than what math predicts. This is the feedback loop that yields actually gains. Pin presses are all about the details; strength is built in the details. It forces you to deal with the nuts and bolts of your lift, stripped of the crutch of full-range leverage and momentum. What can you control? Strip it down to the core of movement and find out.
The map is there in the numbers but the terrain comes from your own body. Honor the dead stop, maintain a solid setup and let the overload be exact, not excessive. Those isolated gains eventually translate back into stronger, smoother full-range presses. You’re back on the bench or floor with newfound power in the once-weak segment. That’s when you realize that less motion can indeed equal more progress.