Overhead Squat Assessment Calculator
Score an overhead squat screen from depth, trunk position, knee tracking, heel behavior, arm position, side shift, ankle mobility, shoulder flexion, pain, and rep consistency.
📌Presets
Presets load realistic overhead squat screen patterns and recalculate the score, restriction index, readiness band, and main priority.
⚙Calculator
Overhead squat screen snapshot
Enter the screen observations to calculate movement score, mobility index, load readiness, and main restriction priority.
📊Fitness Metrics Comparison Grid
📑Reference Tables
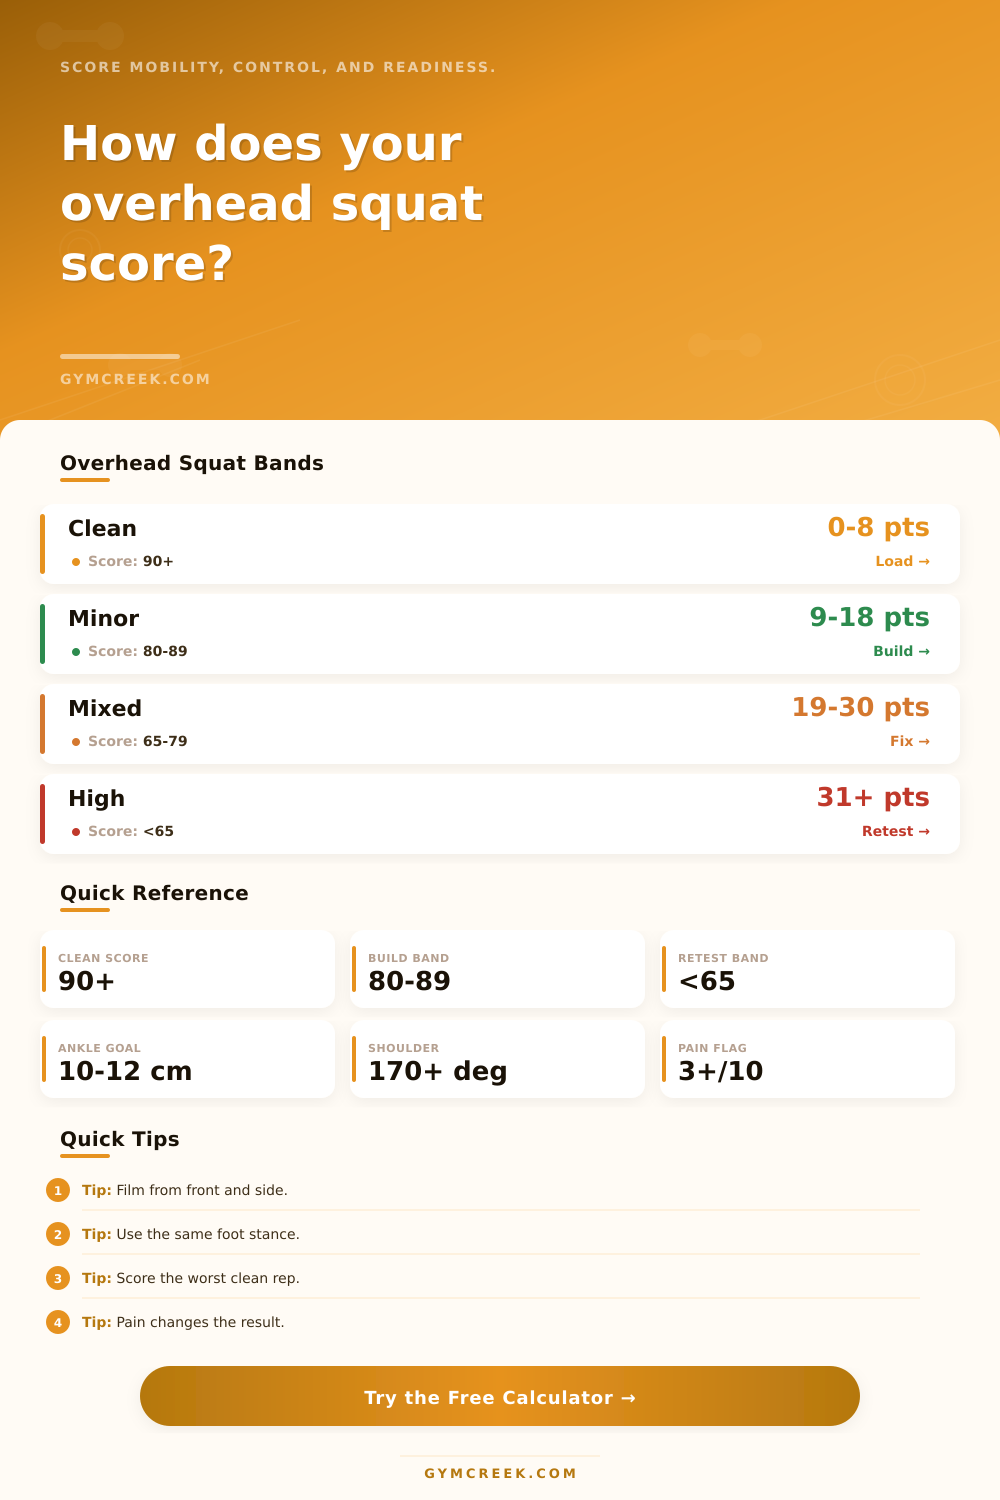
| Movement Score | Screen Meaning | Readiness Read | Next Check |
|---|---|---|---|
| 90-100 | Clean overhead squat with low visible compensation | Usually ready for planned loading if pain-free | Confirm warm-up sets look the same |
| 80-89 | Minor technical or mobility finding | Build gradually and monitor repeat reps | Retest after warm-up or coaching cue |
| 65-79 | Mixed restrictions or repeated compensation | Limit load complexity until pattern improves | Check ankle, shoulder, hip, and trunk separately |
| Under 65 | High compensation or symptom penalty | Retest unloaded and avoid forcing depth | Use a qualified coach or clinician if symptoms appear |
| Compensation | Common Screen Clue | Possible Region | Calculator Penalty |
|---|---|---|---|
| Heels rise or feet turn out | Depth improves only after foot change | Ankle dorsiflexion or calf stiffness | 6 to 18 points |
| Knees collapse inward | Knees move inside second toe | Hip control, foot control, or motor pattern | 7 to 18 points |
| Arms fall forward | Bar moves ahead of mid-foot | Shoulder flexion, lat length, thoracic extension | 8 to 20 points |
| Excessive forward lean | Chest drops to keep balance | Ankle, hip, trunk, or thoracic position | Formula based |
| Side shift or rotation | Pelvis drifts or torso turns | Asymmetry, pain avoidance, or control limit | 7 to 18 points |
| Metric | Useful Range | Why It Matters | Retest Note |
|---|---|---|---|
| Knee-to-wall ankle screen | 10-12 cm or 4-5 in | Supports knee travel without heel rise | Use same stance and heel position |
| Shoulder flexion | 170° or higher | Helps keep arms stacked over mid-foot | Keep ribs down during the test |
| Forward torso lean | 15° or less for strict screens | Large lean often pairs with ankle or trunk limits | Film from the side at hip height |
| Pain rating | 0-2 of 10 | Pain changes confidence and loading decisions | Stop for sharp or increasing pain |
| Formula | Variables | Output | Use |
|---|---|---|---|
| Movement score | 100 minus weighted fault points | 0-100 score | Overall screen read |
| Mobility index | Ankle, shoulder, thoracic, torso | 0-100 index | Restriction estimate |
| Readiness adjustment | Score, pain, reps, load goal | 0-100 readiness | Goal-specific decision support |
| Priority ranking | Largest category penalty | Main limiter | Guides what to inspect next |
💡Assessment Tips
The weight feels light; it shouldn’t be a matter of strength. You hold the PVC pipe overhead. Then you go down to squat. But your knees buckles inwards and your heels come off ground. And then something pushes bar forward and your elbows bend. So you stand back up wondering if you’re weak or if there’s a bigger problem at play.
It also shows why you assess movement patterns first, before adding weight. For many people, the overhead squat is less about an exercise and more about a full-body mirror. Placing the weight above your head expose limitations that a bench press or hidden squat may gloss over. When you have to keep bar stacked atop your mid-foot, there’s no hiding stiff shoulder or tight hips.
Why Checking Your Movement Is Important First
If your ankles are stiff, your torso will lean forward in compensation. If your shoulders don’t have much flexion, your arms will float out in front. If you know what to look for, the pattern becomes clear.
Many people is in a hurry with this test, they’re looking for an immediate pass/fail grading system. Wrong. It takes time to understand what’s going into it. After you enter your findings into the calculator (above), it will do the rest of math for you; however, you’ve got to watch several rep and ask if they appears similar. One good-looking rep doesn’t mean squat when it comes to stability. When three to five reps remain intact while keeping their shape, it means something else entirely regarding fatigue resistance and motor control.
First consider the ankles: They’re typically bottleneck. If your knee can’t go forward over your toes, then your feet will splay outward, or your heels will elevate. And this isn’t a strength issue to start; it’s a mobility limitation requiring a structural workaround. You can use a simple knee-to-wall measurement to test this. Typically, being 10 cm away from the wall is considered good dorsiflexion range and anything less may limit your ability to hold an upright torso under load.
The other factor that’s just as important is condition of your shoulders. To hold those arms straight out at your sides with no bend in your elbow, you must has about one hundred seventy degrees of shoulder flexion. That means many folks are dealing with restricted thoracic extension, tight lat muscles, or both. This forces them to either round their upper back or flare their ribs outwards.
Because bad shoulder posture messes up the whole center of gravity, it’s a huge factor in the calculator’s equation. Now you’re not thinking about recruiting the right muscles; you’re fighting for stability.
Another important tip-off is knee tracking. When descending, do your knees cave inward? That’s an indicator of a lack of foot stability or hip control. It might also mean you’re overloading one side of your foot (the outside edge). This compensation pattern will lead to pain down the road if left unchecked; therefore, the assessment tool not only helps spot these faults but also identifies them.
Things change when it hurts: If you’re getting jabs in the shoulder or pinchy pains in the low back, a 100 isn’t worth squat. Safety is still the top priority, so if something feels uncomfortable enough to worry you, stop immediately regardless of numbers. For that reason, the system has a pain rating, and don’t push past what hurts even for a higher move score.
Don’t use it only for grading yourself, but also to find out what’s limiting you most. You might be limited by asymmetries, a lack of shoulder mobility, or stiff ankles. Whatever the case may be, knowing where the issue lies will help point you in the right direction when correcting it.
Build from the ground up. Add weight confidently after ensuring that the pattern feels pain-free and clean. Better movement before heavier load is always the goal, so stand tall, balance out and follow the data on your next move.