Eccentric Load Calculator
Plan eccentric overload from your concentric 1RM, tempo, assistance, reps, sets, soreness risk, and recovery window.
📌Eccentric Presets
Each preset loads a distinct eccentric setup with realistic overload, assistance, and recovery assumptions.
⚙Calculator
Eccentric overload snapshot
Enter your 1RM and session design to estimate load, exposure, risk, and recovery.
📊Session Metrics
📑Reference Tables
| Zone | Eccentric % | Best Use | Recovery |
|---|---|---|---|
| Control | 70-95% | Technique | 24-48 hr |
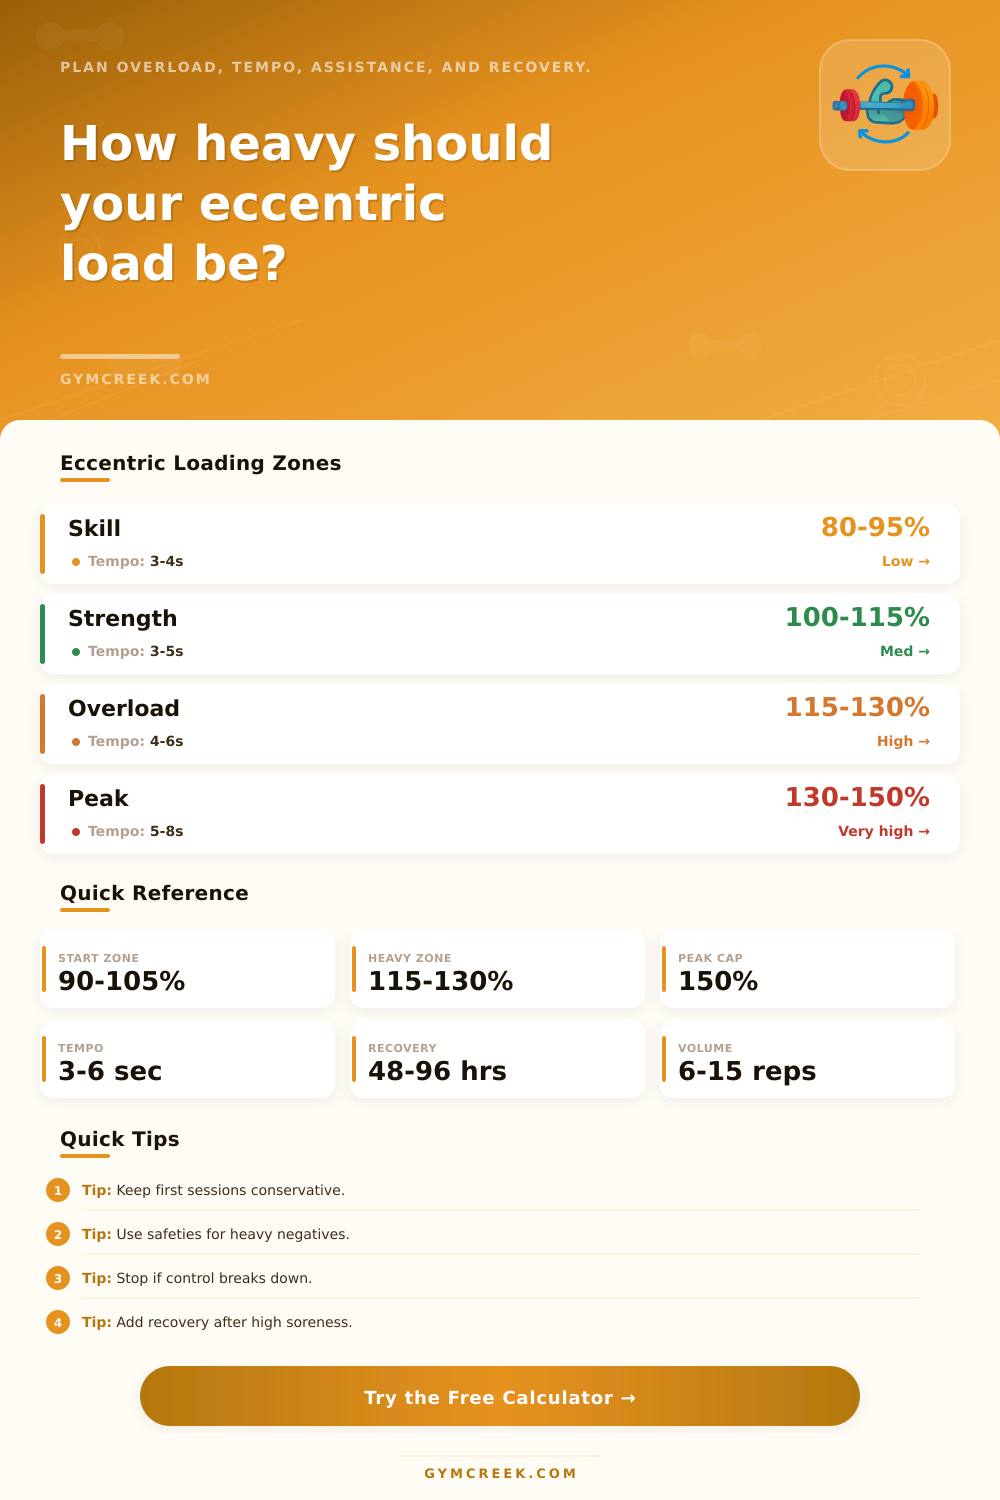
| Strength | 100-115% | Heavy skill | 48-72 hr |
| Overload | 115-130% | Advanced force | 72-96 hr |
| Peak | 130-150% | Rare exposure | 96+ hr |
| Tempo | Feel | Rep Cap | Use Case |
|---|---|---|---|
| 2-3 sec | Brisk | 8-15 | Volume |
| 4-5 sec | Controlled | 4-10 | Strength |
| 6-8 sec | Demanding | 2-6 | Overload |
| 9-12 sec | Max control | 1-4 | Testing |
| Assistance | Return Load | Typical Setup | Control Cue |
|---|---|---|---|
| 0-15% | Very heavy | Pins only | Brace hard |
| 20-35% | Heavy | Spotter help | Smooth path |
| 40-60% | Moderate | Machine assist | Even speed |
| 65-90% | Light return | Self assist | No grinding |
| Risk Score | Soreness | Next Session | Adjustment |
|---|---|---|---|
| 0-29 | Low | 24-48 hr | Hold plan |
| 30-54 | Moderate | 48-72 hr | Repeat first |
| 55-74 | High | 72-96 hr | Trim volume |
| 75+ | Very high | 96+ hr | Reduce load |
💡Tips
All this is why eccentric training gets a name for being pretty darn physically demanding. Because the lowering part of any lift will generate greater force than the lifting part, your tendons and muscles is subjected to forces not typically met in normal concentric exercise. This increased stress contributes to better control or strength development, but also to soreness and fatigue that may persist for days.
To keep that stress productive and not overwhelming, make sure you’re measuring what you applys. After you plug in your concentric one-rep max and select your desired rep range (i.e., how much higher than that max you’ll be taking it down), the calculator above will crunch numbers. Then it factors in reps you’d like to perform with control (not necessarily all reps), amount of assistance you think you can get on ascent, and tempo you’ll be using.
How to Use the Calculator Safely
These variables is important because they alter effective load, or what your body has to handle during this exercise, as well as the overall time under tension. For example, 115 percent of your max lowered in four seconds differ from when it’s lowered in six seconds, even if the plate weighs the same thing.
The outcome is also influenced by your recovery readiness (and by recent exposure). Numbers that seem fine on paper might be more painful then anticipated if you haven’t done any heavy negatives for several weeks. To account for this, the tool will include recovery readiness and adjust the risk score. It gives you a better sense of when you should of repeat something similar. However, that advice depends on your honesty in answering the readiness question, best to track what you actualy experienced following your previous session instead of guessing at how you feel.
Another practical trade-off is what tempo you choose. If you go with shorter eccentric phases, you’ll be able to rack up more reps and thus more volume. However, this sacrifice some of the force development for which this method is effective. Going longer increases requirement for connective tissue and control, which is why more advanced lifters tends to limit their sessions to very low rep ranges.
You can use the calculator to see how many seconds it totals while under tension… And if it’s within a range corresponding to your goal. The other thing many lifter don’t consider is the return phase. If someone’s helping take some of the load off during your upward move, then you’re overloading yourself during the lowering phase while not having to deal with the full weight again on the way up. It calculates what weight you still have left to reset and/or lift, which should prevent most from misinterpreting why the bar “feels light”, it’s just because someone was there to help. You’ll find it helps mentally keep that number in mind too when determining if you really do need a partner, pins, or a machine to assist you.
The following reference tables lay out various exposure percentages according to your goal (technique work, higher end performance, etc.), with 130-plus being the rare exception. It also illustrates how your risk score, assistance level, and tempo correspond to recovery time frames. Because connective tissue adapts slower than muscle, diving right into the upper end is counterproductive and will result in more setbacks then gains.
This is the point: the numbers and context prevent eccentric work from becoming a guessing game. You’re still deciding just how aggressive you want to get on a particular day but the planning won’t feel as much like a shot in the dark.