Accommodating Resistance Calculator
Plan straight weight, band tension, chain deload, top percentage, and bottom percentage for squats, bench, deadlifts, and press variations.
📌Presets
Presets load common accommodating resistance setups and calculate both the intended targets and actual load curve.
⚙Calculator
Accommodating load snapshot
Enter your 1RM, target percentages, and attachment tension to calculate the load curve.
📊Resistance Metrics Grid
📑Reference Tables
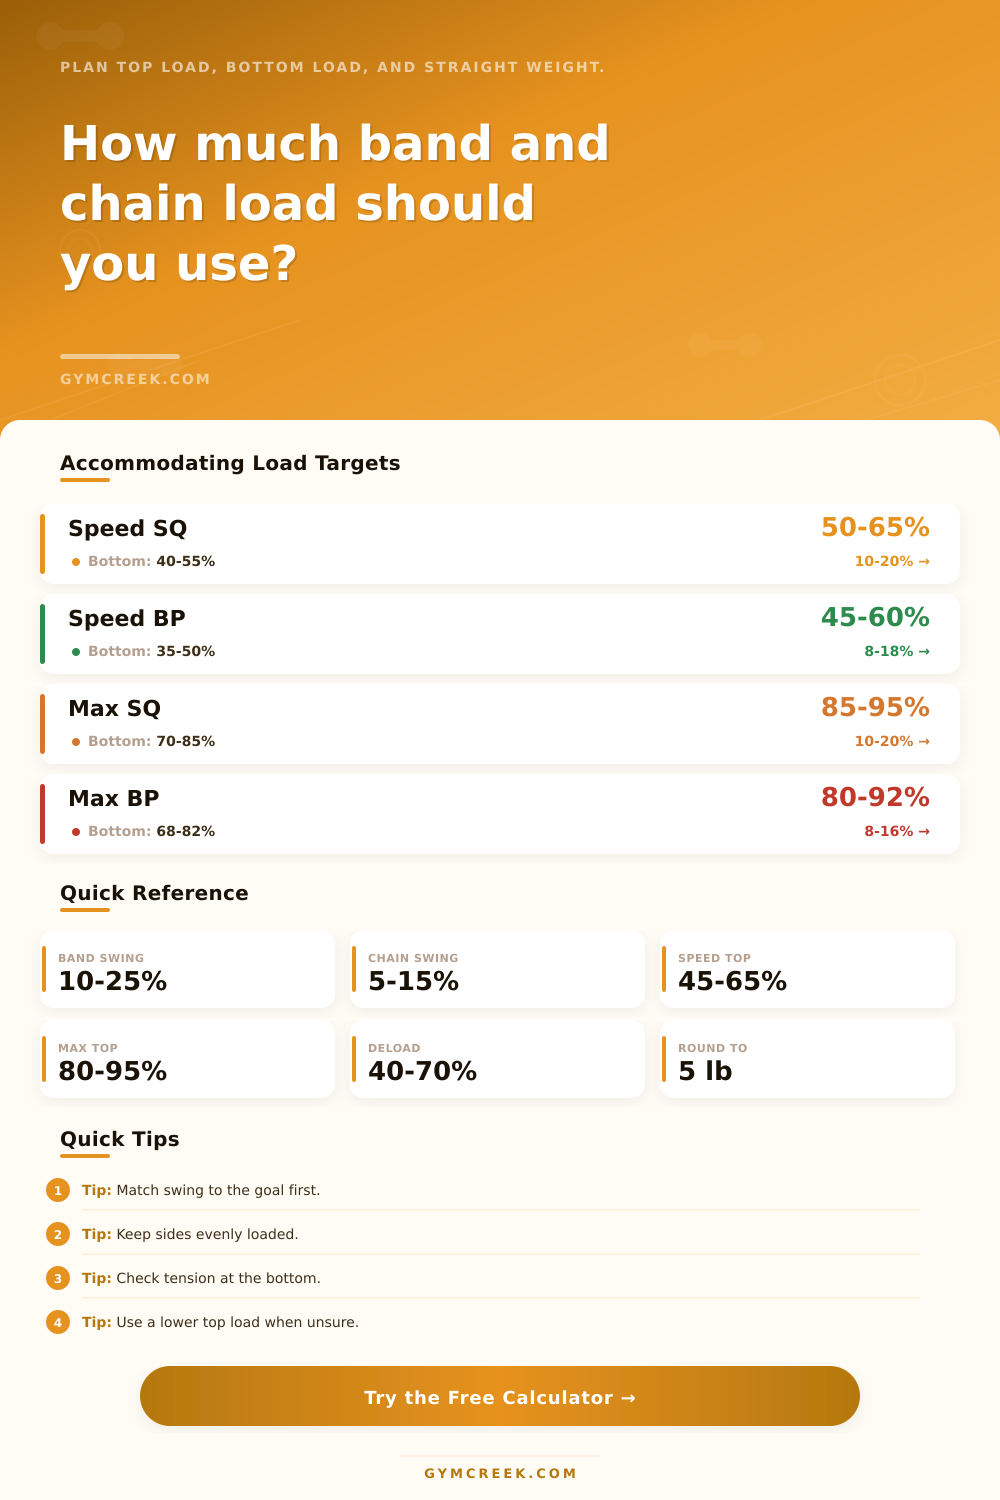
| Lift Goal | Top Load | Bottom Load | Common Swing |
|---|---|---|---|
| Speed squat | 50-65% | 40-55% | 10-20% |
| Speed bench | 45-60% | 35-50% | 8-18% |
| Max effort squat | 85-95% | 70-85% | 10-20% |
| Max effort bench | 80-92% | 68-82% | 8-16% |
| Technique deload | 40-55% | 35-48% | 5-12% |
| Setup | Best Use | Bottom Feel | Top Feel |
|---|---|---|---|
| Bands only | Speed and reversal | Still active | Fast tension rise |
| Chains only | Stable overload | Smoother deload | Heavy lockout |
| Mixed | Precise curves | Moderate | Balanced |
| Manual | Measured setups | User defined | User defined |
| Profile | 1RM | Top | Setup Target |
|---|---|---|---|
| Novice bench | 185 lb | 50% | Light bands |
| Raw squat | 405 lb | 62% | Band speed |
| Equipped squat | 700 lb | 88% | Mixed overload |
| Deadlift pull | 500 lb | 60% | Moderate bands |
| Press wave | 155 lb | 55% | Mini bands |
| Formula | Variables | Output | Use |
|---|---|---|---|
| Top load | 1RM x top % | Target | Lockout limit |
| Bottom load | 1RM x bottom % | Target | Start position |
| Band swing | Top - bottom | Added rise | Anchor check |
| Chain deload | Chain x removed % | Load change | Floor contact |
| Straight wt | Bottom - added | Bar load | Plate plan |
💡Tips
While you could play around with chain lengths and bands thicknesses by guesswork, here’s a little load curve planner that lets you dial in the way weight will feel. At a glance, all those inputs may appear daunting, but they’re simply translating into what you prefer the weight to feel like. Your one-rep max establish the ceiling; the percentage at the top/bottom establishes the slope of the curve.
A high top percentage paired with a low bottom percentage results in a steep curve that increases the effort as it nears lockout. This is great for overcoming sticking points and developing speed, but it is not so great if your tendons is still recovering from a heavy week.
How to Use the Resistance Planner Tool
People always focus on total amount they move at the top and miss it at the bottom. That is where most people mess up. How hard does the first dip/pull feel? The answer is the straight weight you placed onto bar. If the flat weight isn’t high enough, then there’s no incentive to come out of the hole with aggression because there’s nothing holding you back. So if you squatted, for example, and your chest didn’t even make contact with floor until after your hips did, that was likely due to a low starting weight. You want enough load on the bar to force good technique from inch one.
The calculator subtracts the estimated contribution of chains or bands at the bottom. This lets you find the sweet spot while knowing you are not wasting any strength in the toughest part of the movement.
While bands and chains both increase resistance to the bar as it moves, there is a slight difference in what each one do. Exponential tension (like that provided by bands) increases rapidly after a certain point (i.e., once you go past a certain height, the tension spikes). Think of how explosive movements can stores elastic recoil in your tendons and muscles. Linear progression (as with chains) will feel more naturaly for maximal strength phase training, where stability is more important then pure raw acceleration. If you want best of both worlds, try mixing the two to smooth out the transition from the fast top to the slow bottom.
The tool also comes with some reference tables that illustrate common percentage ranges for max effort training vs. This refers to speed work. These guidelines keep your progressions safe but still give you a meaningful stimulus. We should of consider not only the safety of the lifting itself, but also the risk of burning out over months of training. All too often, the peak load is beyond what you’ve been accustomed to handling with straight weight, which will fry your central nervous system much quicker then you’d think due to a sudden increase in accommodating resistance.
Don’t forget to always verify your true top load after rounding up/down to the nearest increment. Five pounds may sound unimportant; however, multiply it times the leverage at lockout and it becomes significant for your brain. If you’re feeling shaky, or the day simply doesn’t feel right, use buffer setting in calculator to drop that peak accordingly. So take it easy at first with these tools. Let your technique adapt before your strength does.
Chances are what feels good won’t be forcing reps but instead moving smoothly through the motions. It’s not about being frantic at the top, but more so keeping constant tension from start to finish with the movement pattern. As you trust the numbers and settle on the right loads, you’ll also see your bar speed improve on straight weight sets. This is the whole purpose of using this stuff in the first place, that transfer.
All that said, it’s really nothing more than an exercise in rational decision-making regarding fatigue allocation. It’s not a battle against nature, but an act of accepting it and working within its strength curve by creating a resistance to match. If everything balances throughout the set then you’re no longer worried about getting through, just how hard you can push.
Maintain the pressure level that fits your needs and change up based off what you’re getting stronger at. The incline goes up, as do your legs and hands. All you have to do is ascend intentionally and not guess at what gear you should be putting it in.